|
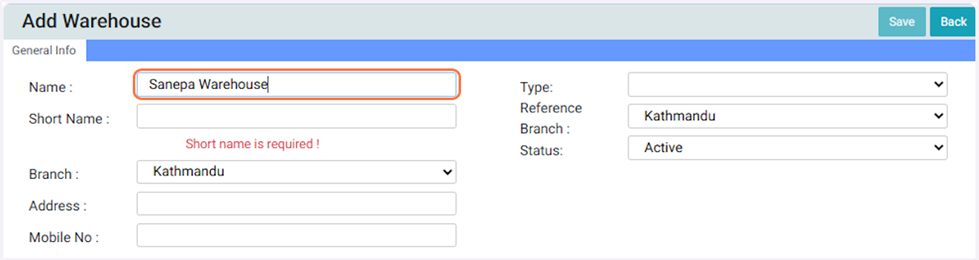
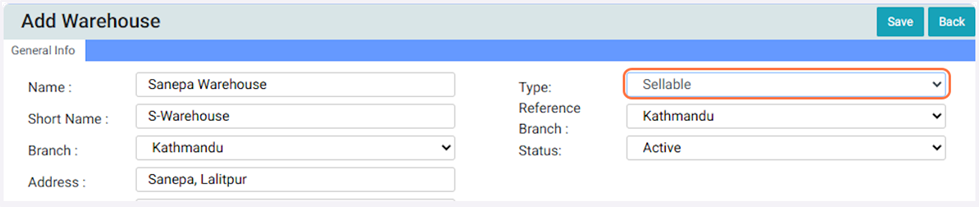
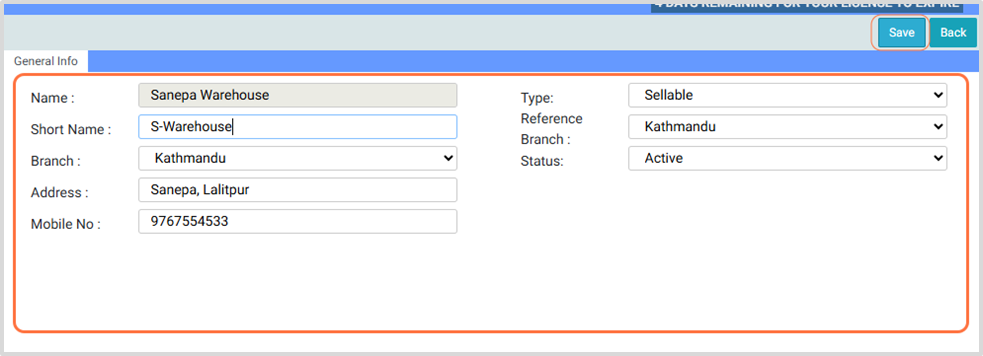
clipboard-202511251127-0lynw.png (331 KB)
clipboard-202511251127-0lynw.png |
|
Sujata Khatri, 11/25/2025 05:42 AM
|
|
|
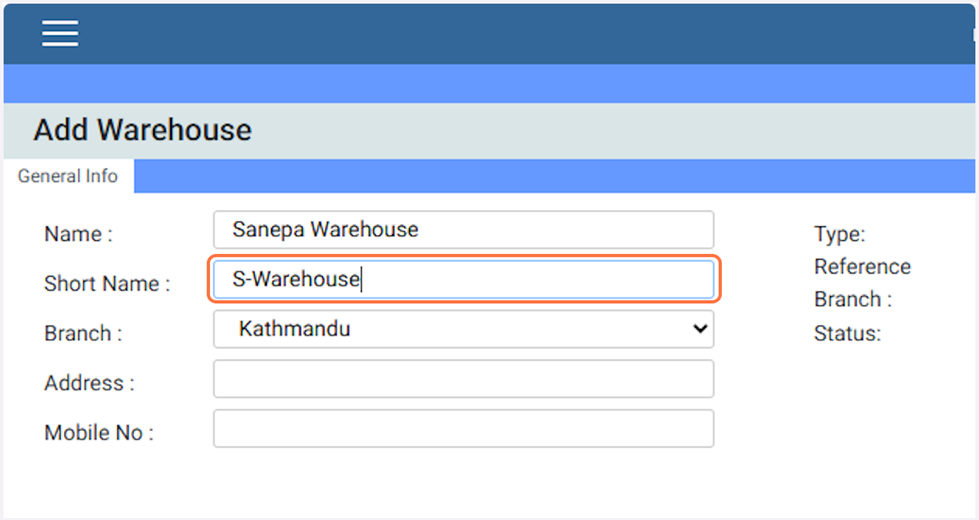
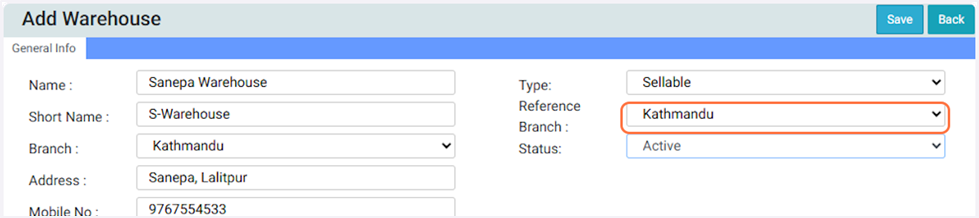
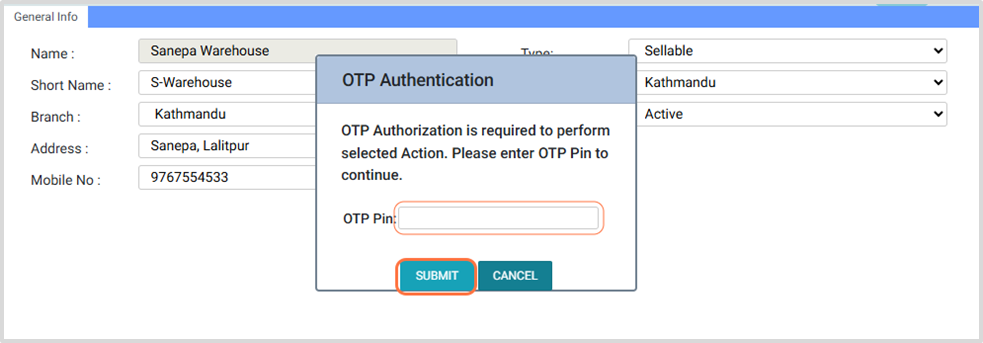
clipboard-202511251127-lxwth.png (331 KB)
clipboard-202511251127-lxwth.png |
|
Sujata Khatri, 11/25/2025 05:42 AM
|
|
|
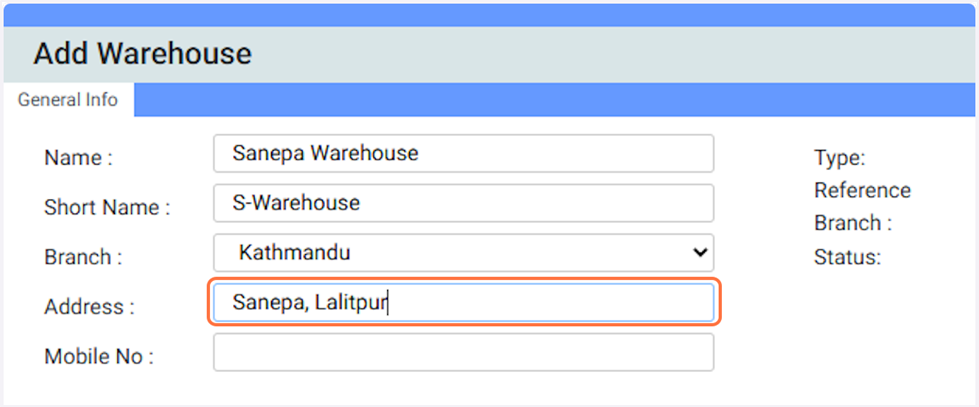
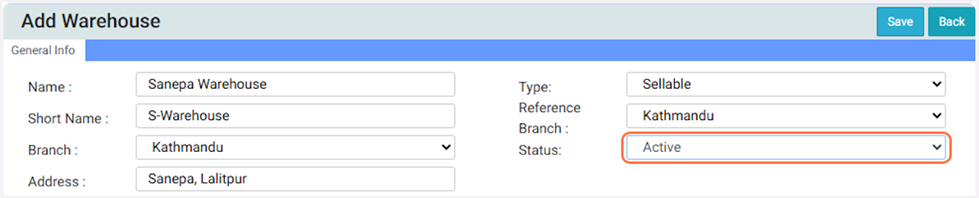
clipboard-202511251128-8o8jt.png (241 KB)
clipboard-202511251128-8o8jt.png |
|
Sujata Khatri, 11/25/2025 05:43 AM
|
|
|
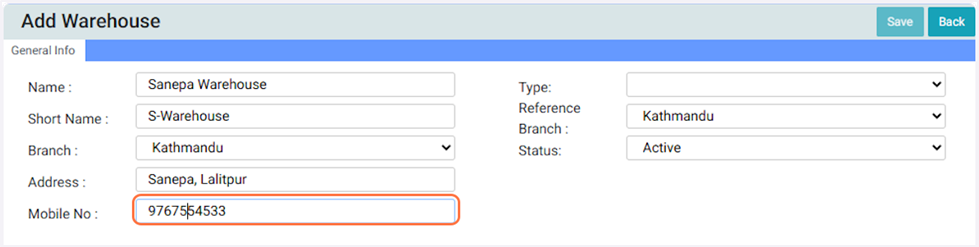
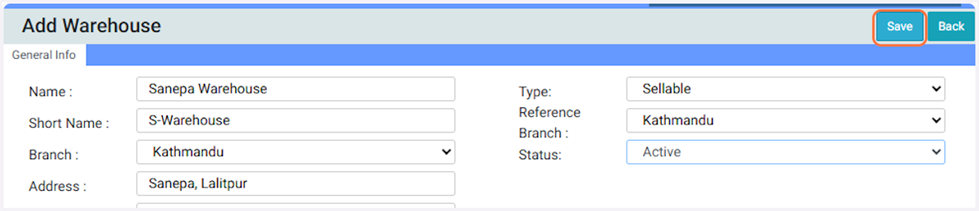
clipboard-202511251128-ys1ua.png (277 KB)
clipboard-202511251128-ys1ua.png |
|
Sujata Khatri, 11/25/2025 05:43 AM
|
|
|
clipboard-202511251128-ubts9.png (107 KB)
clipboard-202511251128-ubts9.png |
|
Sujata Khatri, 11/25/2025 05:43 AM
|
|
|
clipboard-202511251129-bt2f4.png (49 KB)
clipboard-202511251129-bt2f4.png |
|
Sujata Khatri, 11/25/2025 05:44 AM
|
|
|
clipboard-202511251129-7llus.png (87.2 KB)
clipboard-202511251129-7llus.png |
|
Sujata Khatri, 11/25/2025 05:44 AM
|
|
|
clipboard-202511251130-ostry.png (41.9 KB)
clipboard-202511251130-ostry.png |
|
Sujata Khatri, 11/25/2025 05:45 AM
|
|
|
clipboard-202511251131-pfbjn.png (90.7 KB)
clipboard-202511251131-pfbjn.png |
|
Sujata Khatri, 11/25/2025 05:46 AM
|
|
|
clipboard-202511251131-ntj7z.png (53 KB)
clipboard-202511251131-ntj7z.png |
|
Sujata Khatri, 11/25/2025 05:46 AM
|
|
|
clipboard-202511251132-bwrfz.png (49.4 KB)
clipboard-202511251132-bwrfz.png |
|
Sujata Khatri, 11/25/2025 05:47 AM
|
|
|
clipboard-202511251132-tfnr4.png (53.9 KB)
clipboard-202511251132-tfnr4.png |
|
Sujata Khatri, 11/25/2025 05:47 AM
|
|
|
clipboard-202511251132-gpze8.png (48.7 KB)
clipboard-202511251132-gpze8.png |
|
Sujata Khatri, 11/25/2025 05:47 AM
|
|
|
clipboard-202511251133-hcpbs.png (49.8 KB)
clipboard-202511251133-hcpbs.png |
|
Sujata Khatri, 11/25/2025 05:48 AM
|
|
|
clipboard-202511251133-ffrfu.png (82.8 KB)
clipboard-202511251133-ffrfu.png |
|
Sujata Khatri, 11/25/2025 05:48 AM
|
|
|
clipboard-202511251133-tlx35.png (91.4 KB)
clipboard-202511251133-tlx35.png |
|
Sujata Khatri, 11/25/2025 05:48 AM
|
|
|
clipboard-202511251134-kdeax.png (86.8 KB)
clipboard-202511251134-kdeax.png |
|
Sujata Khatri, 11/25/2025 05:49 AM
|
|
|
clipboard-202511251134-sw3ly.png (60.1 KB)
clipboard-202511251134-sw3ly.png |
|
Sujata Khatri, 11/25/2025 05:49 AM
|
|
|
clipboard-202511251134-glchi.png (79.3 KB)
clipboard-202511251134-glchi.png |
|
Sujata Khatri, 11/25/2025 05:49 AM
|
|
|
clipboard-202511251135-vx3x1.png (53.5 KB)
clipboard-202511251135-vx3x1.png |
|
Sujata Khatri, 11/25/2025 05:50 AM
|
|
|
clipboard-202511251135-ooxze.png (72.9 KB)
clipboard-202511251135-ooxze.png |
|
Sujata Khatri, 11/25/2025 05:50 AM
|
|
|
clipboard-202511251136-0qoj6.png (79.5 KB)
clipboard-202511251136-0qoj6.png |
|
Sujata Khatri, 11/25/2025 05:51 AM
|
|