|
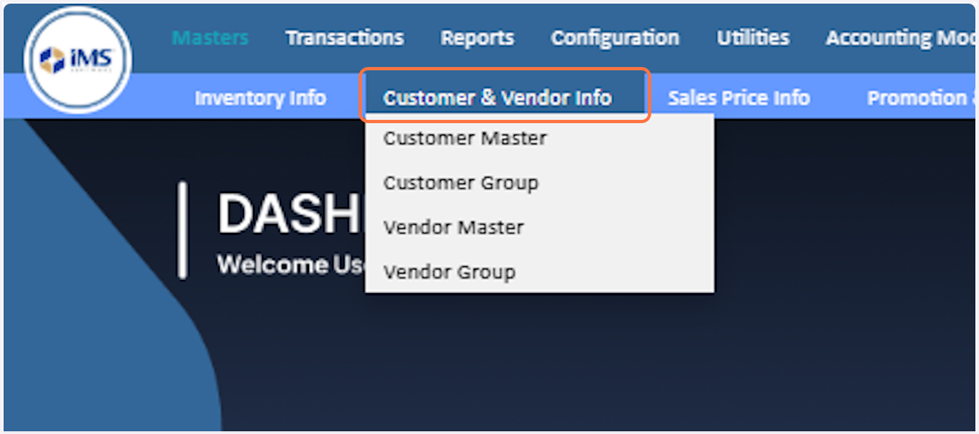
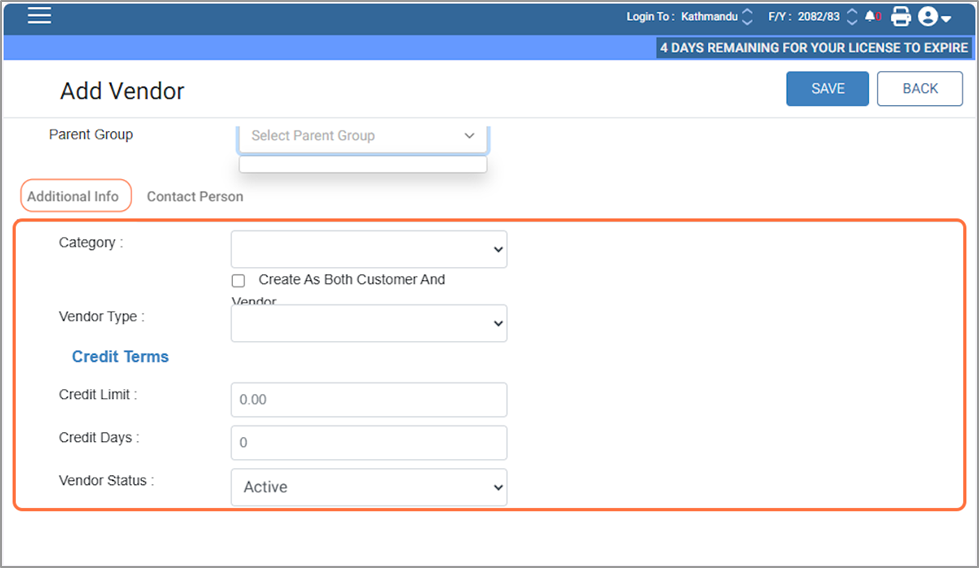
clipboard-202511241514-ionsr.png (263 KB)
clipboard-202511241514-ionsr.png |
|
Sujata Khatri, 11/24/2025 09:29 AM
|
|
|
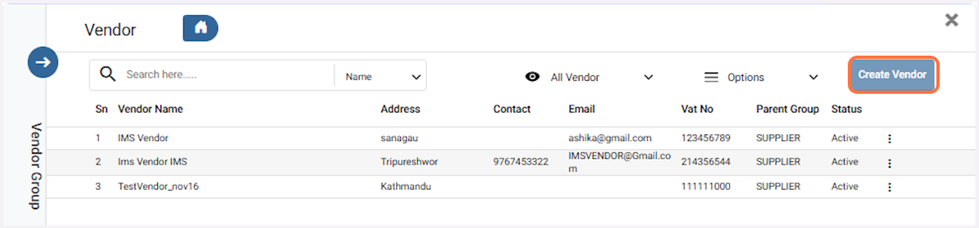
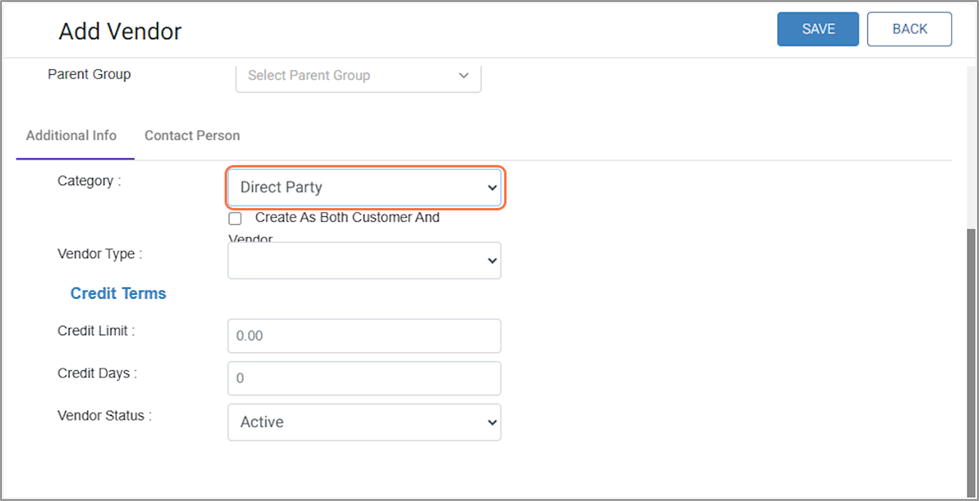
clipboard-202511241516-czigm.png (218 KB)
clipboard-202511241516-czigm.png |
|
Sujata Khatri, 11/24/2025 09:31 AM
|
|
|
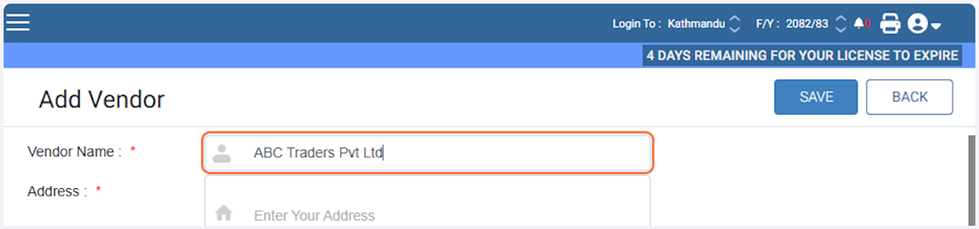
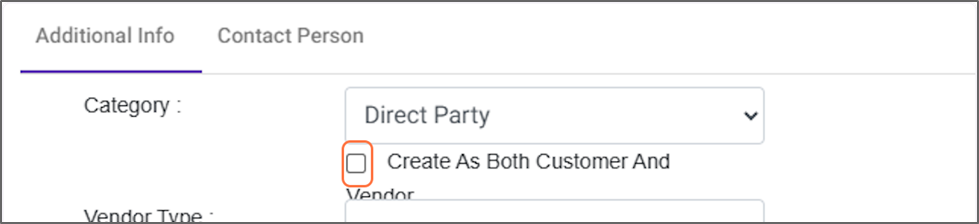
clipboard-202511241517-4s4rm.png (171 KB)
clipboard-202511241517-4s4rm.png |
|
Sujata Khatri, 11/24/2025 09:32 AM
|
|
|
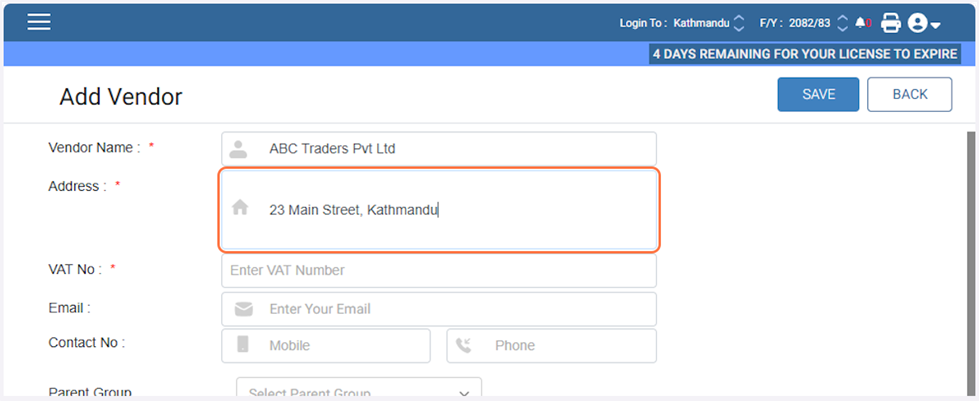
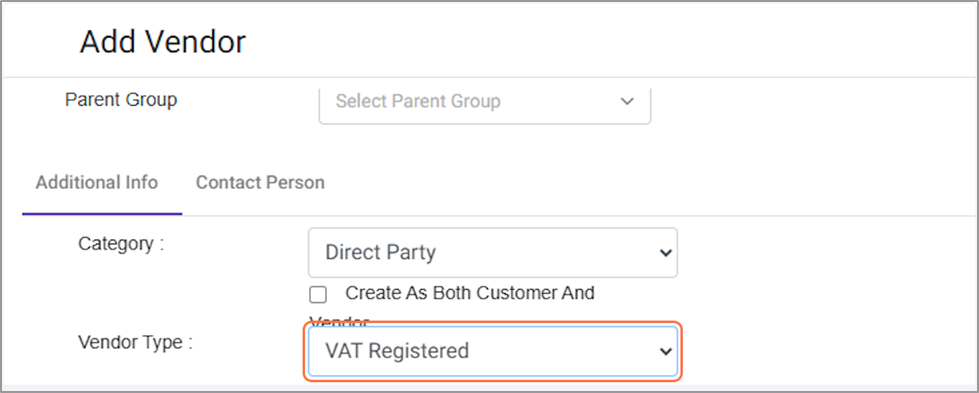
clipboard-202511241517-rj7eh.png (62.8 KB)
clipboard-202511241517-rj7eh.png |
|
Sujata Khatri, 11/24/2025 09:32 AM
|
|
|
clipboard-202511241518-xellg.png (54.5 KB)
clipboard-202511241518-xellg.png |
|
Sujata Khatri, 11/24/2025 09:33 AM
|
|
|
clipboard-202511241518-2c3je.png (80 KB)
clipboard-202511241518-2c3je.png |
|
Sujata Khatri, 11/24/2025 09:33 AM
|
|
|
clipboard-202511241518-pu4iz.png (47.7 KB)
clipboard-202511241518-pu4iz.png |
|
Sujata Khatri, 11/24/2025 09:33 AM
|
|
|
clipboard-202511241519-bznxa.png (50.3 KB)
clipboard-202511241519-bznxa.png |
|
Sujata Khatri, 11/24/2025 09:34 AM
|
|
|
clipboard-202511241519-okx0g.png (51.3 KB)
clipboard-202511241519-okx0g.png |
|
Sujata Khatri, 11/24/2025 09:34 AM
|
|
|
clipboard-202511241519-qhckf.png (52.8 KB)
clipboard-202511241519-qhckf.png |
|
Sujata Khatri, 11/24/2025 09:34 AM
|
|
|
clipboard-202511241520-6fzoy.png (86.6 KB)
clipboard-202511241520-6fzoy.png |
|
Sujata Khatri, 11/24/2025 09:35 AM
|
|
|
clipboard-202511241520-2j0om.png (56.2 KB)
clipboard-202511241520-2j0om.png |
|
Sujata Khatri, 11/24/2025 09:35 AM
|
|
|
clipboard-202511241520-t2o6m.png (39.3 KB)
clipboard-202511241520-t2o6m.png |
|
Sujata Khatri, 11/24/2025 09:35 AM
|
|
|
clipboard-202511241521-okokb.png (61.3 KB)
clipboard-202511241521-okokb.png |
|
Sujata Khatri, 11/24/2025 09:36 AM
|
|
|
clipboard-202511241521-rwdhl.png (61.3 KB)
clipboard-202511241521-rwdhl.png |
|
Sujata Khatri, 11/24/2025 09:36 AM
|
|
|
clipboard-202511241521-iktfu.png (61.3 KB)
clipboard-202511241521-iktfu.png |
|
Sujata Khatri, 11/24/2025 09:36 AM
|
|
|
clipboard-202511241521-ztl0i.png (61.3 KB)
clipboard-202511241521-ztl0i.png |
|
Sujata Khatri, 11/24/2025 09:36 AM
|
|
|
clipboard-202511241521-wdnd9.png (61.3 KB)
clipboard-202511241521-wdnd9.png |
|
Sujata Khatri, 11/24/2025 09:36 AM
|
|
|
clipboard-202511241521-mxd3w.png (61.3 KB)
clipboard-202511241521-mxd3w.png |
|
Sujata Khatri, 11/24/2025 09:36 AM
|
|
|
clipboard-202511241521-tnwxl.png (61.3 KB)
clipboard-202511241521-tnwxl.png |
|
Sujata Khatri, 11/24/2025 09:36 AM
|
|
|
clipboard-202511241523-ozdcd.png (50 KB)
clipboard-202511241523-ozdcd.png |
|
Sujata Khatri, 11/24/2025 09:38 AM
|
|
|
clipboard-202511241524-yvnen.png (35.9 KB)
clipboard-202511241524-yvnen.png |
|
Sujata Khatri, 11/24/2025 09:39 AM
|
|
|
clipboard-202511241524-zc0kh.png (59.7 KB)
clipboard-202511241524-zc0kh.png |
|
Sujata Khatri, 11/24/2025 09:39 AM
|
|
|
clipboard-202511241524-njqpf.png (86.2 KB)
clipboard-202511241524-njqpf.png |
|
Sujata Khatri, 11/24/2025 09:39 AM
|
|
|
clipboard-202511241525-q8nux.png (99.8 KB)
clipboard-202511241525-q8nux.png |
|
Sujata Khatri, 11/24/2025 09:40 AM
|
|
|
clipboard-202511241525-bl5ic.png (75.7 KB)
clipboard-202511241525-bl5ic.png |
|
Sujata Khatri, 11/24/2025 09:40 AM
|
|
|
clipboard-202511241525-9p4lo.png (97.1 KB)
clipboard-202511241525-9p4lo.png |
|
Sujata Khatri, 11/24/2025 09:40 AM
|
|
|
clipboard-202511241526-a0tji.png (103 KB)
clipboard-202511241526-a0tji.png |
|
Sujata Khatri, 11/24/2025 09:41 AM
|
|
|
clipboard-202511241526-vtbqk.png (80.1 KB)
clipboard-202511241526-vtbqk.png |
|
Sujata Khatri, 11/24/2025 09:41 AM
|
|