|
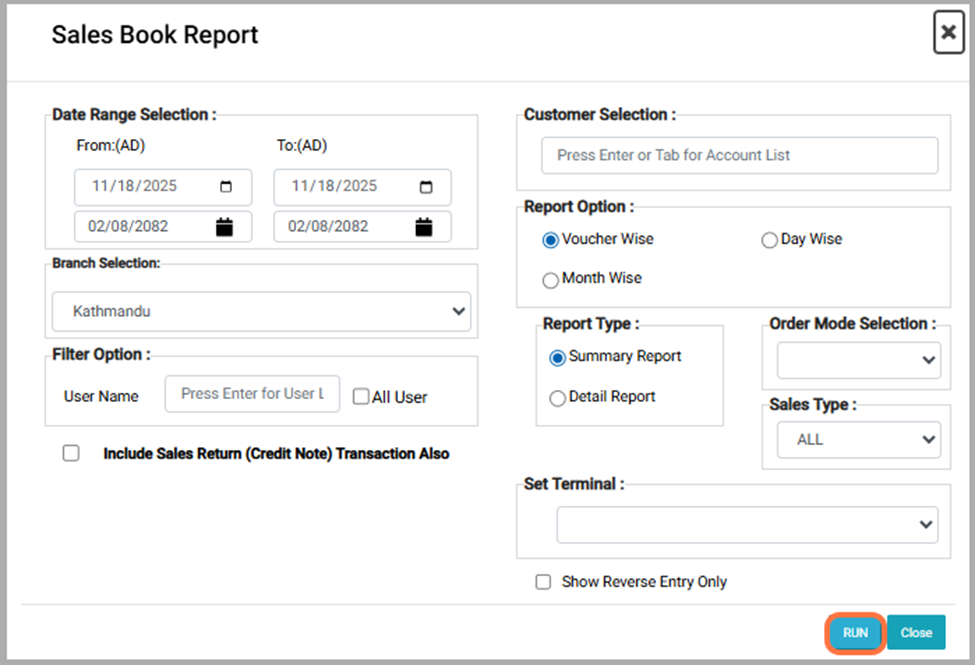
clipboard-202511271548-fa2im.png (115 KB)
clipboard-202511271548-fa2im.png |
|
Sujata Khatri, 11/27/2025 10:03 AM
|
|
|
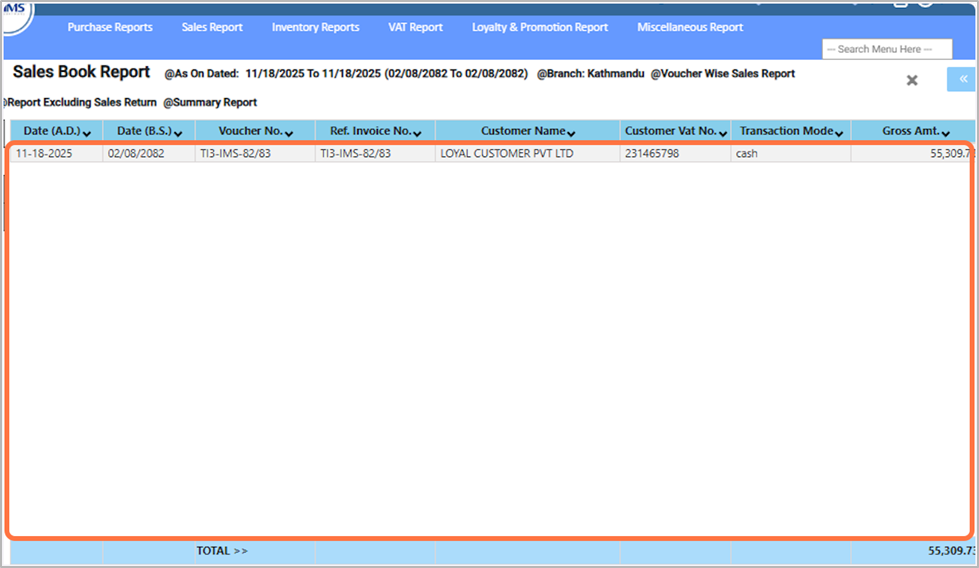
clipboard-202511271548-byep1.png (324 KB)
clipboard-202511271548-byep1.png |
|
Sujata Khatri, 11/27/2025 10:03 AM
|
|
|
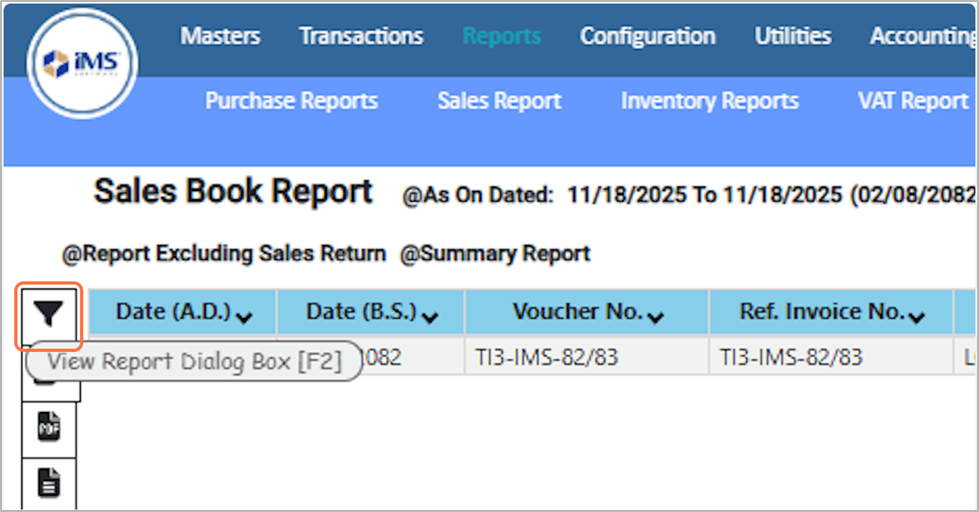
clipboard-202511271548-r9tg7.png (291 KB)
clipboard-202511271548-r9tg7.png |
|
Sujata Khatri, 11/27/2025 10:03 AM
|
|
|
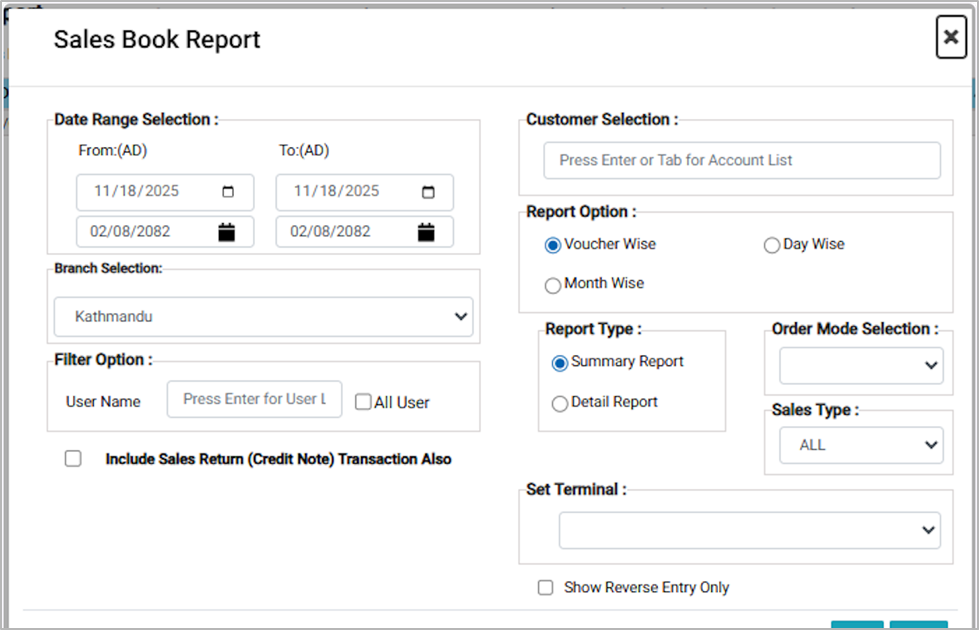
clipboard-202511271549-3pyy7.png (162 KB)
clipboard-202511271549-3pyy7.png |
|
Sujata Khatri, 11/27/2025 10:04 AM
|
|
|
clipboard-202511271550-wwsiz.png (115 KB)
clipboard-202511271550-wwsiz.png |
|
Sujata Khatri, 11/27/2025 10:05 AM
|
|
|
clipboard-202511271551-lmtbb.png (264 KB)
clipboard-202511271551-lmtbb.png |
|
Sujata Khatri, 11/27/2025 10:06 AM
|
|
|
clipboard-202511271551-h69pe.png (163 KB)
clipboard-202511271551-h69pe.png |
|
Sujata Khatri, 11/27/2025 10:06 AM
|
|
|
clipboard-202511271551-txad0.png (195 KB)
clipboard-202511271551-txad0.png |
|
Sujata Khatri, 11/27/2025 10:06 AM
|
|
|
clipboard-202511271551-fufmw.png (126 KB)
clipboard-202511271551-fufmw.png |
|
Sujata Khatri, 11/27/2025 10:06 AM
|
|
|
clipboard-202511271551-0xngx.png (194 KB)
clipboard-202511271551-0xngx.png |
|
Sujata Khatri, 11/27/2025 10:06 AM
|
|
|
clipboard-202511271552-ewexc.png (183 KB)
clipboard-202511271552-ewexc.png |
|
Sujata Khatri, 11/27/2025 10:07 AM
|
|
|
clipboard-202511271552-bamuz.png (47 KB)
clipboard-202511271552-bamuz.png |
|
Sujata Khatri, 11/27/2025 10:07 AM
|
|
|
clipboard-202511271552-hhtex.png (98.3 KB)
clipboard-202511271552-hhtex.png |
|
Sujata Khatri, 11/27/2025 10:07 AM
|
|
|
clipboard-202511271553-vp2hg.png (125 KB)
clipboard-202511271553-vp2hg.png |
|
Sujata Khatri, 11/27/2025 10:08 AM
|
|