|
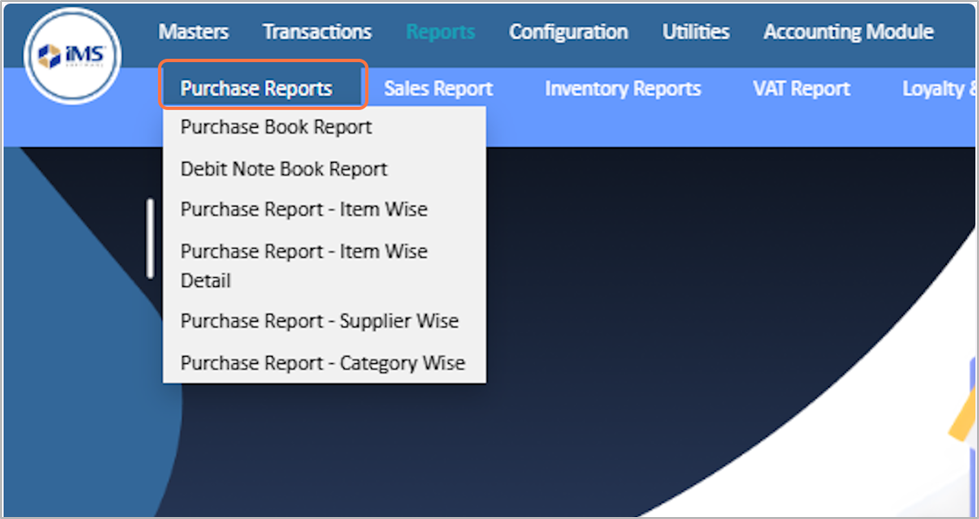
clipboard-202511271536-mr9d4.png (115 KB)
clipboard-202511271536-mr9d4.png |
|
Sujata Khatri, 11/27/2025 09:51 AM
|
|
|
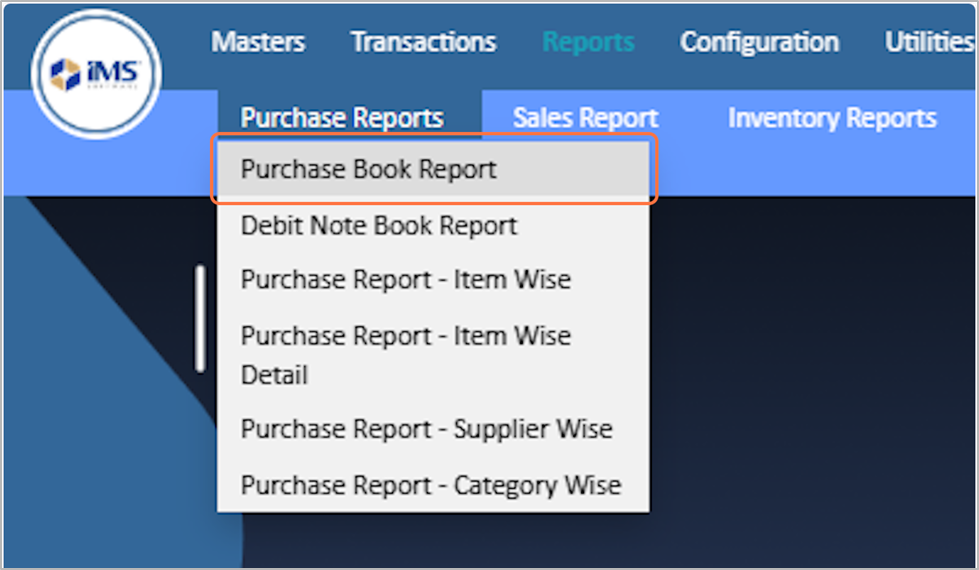
clipboard-202511271537-ciw3w.png (238 KB)
clipboard-202511271537-ciw3w.png |
|
Sujata Khatri, 11/27/2025 09:52 AM
|
|
|
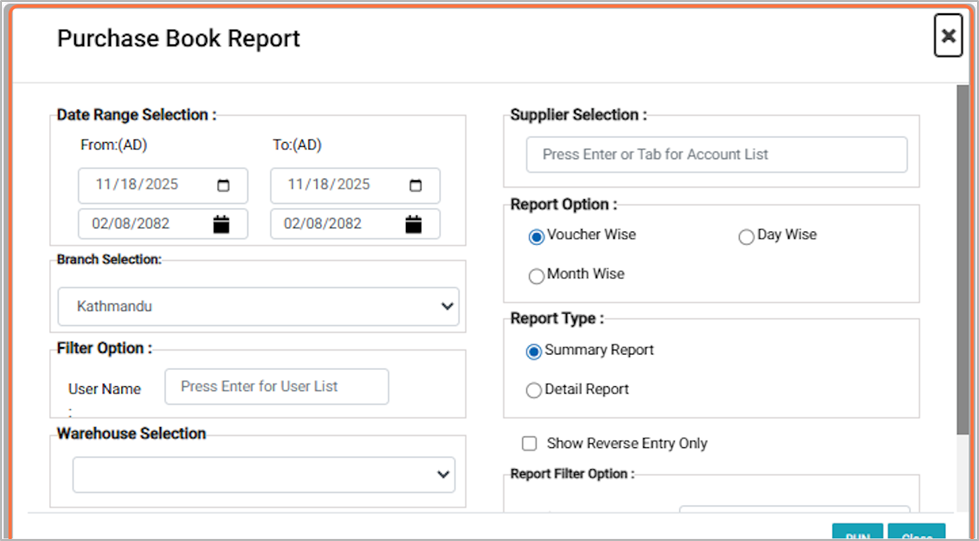
clipboard-202511271537-zojfk.png (274 KB)
clipboard-202511271537-zojfk.png |
|
Sujata Khatri, 11/27/2025 09:52 AM
|
|
|
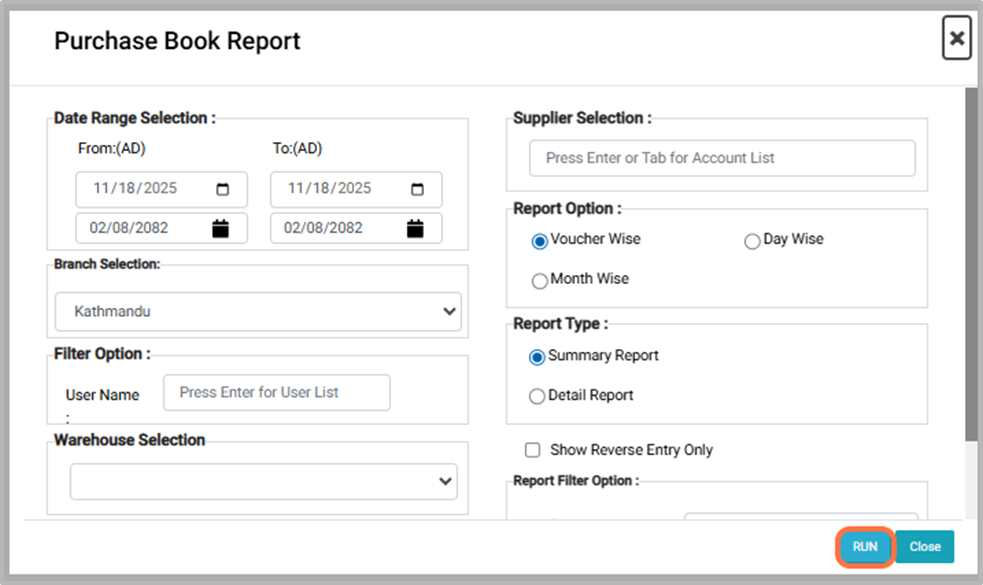
clipboard-202511271537-lt089.png (121 KB)
clipboard-202511271537-lt089.png |
|
Sujata Khatri, 11/27/2025 09:52 AM
|
|
|
clipboard-202511271538-edxfs.png (124 KB)
clipboard-202511271538-edxfs.png |
|
Sujata Khatri, 11/27/2025 09:53 AM
|
|
|
clipboard-202511271538-szpkk.png (113 KB)
clipboard-202511271538-szpkk.png |
|
Sujata Khatri, 11/27/2025 09:53 AM
|
|
|
clipboard-202511271538-jnvr0.png (228 KB)
clipboard-202511271538-jnvr0.png |
|
Sujata Khatri, 11/27/2025 09:53 AM
|
|
|
clipboard-202511271539-e75mc.png (122 KB)
clipboard-202511271539-e75mc.png |
|
Sujata Khatri, 11/27/2025 09:54 AM
|
|
|
clipboard-202511271539-izspg.png (278 KB)
clipboard-202511271539-izspg.png |
|
Sujata Khatri, 11/27/2025 09:54 AM
|
|
|
clipboard-202511271539-zlrpz.png (127 KB)
clipboard-202511271539-zlrpz.png |
|
Sujata Khatri, 11/27/2025 09:54 AM
|
|
|
clipboard-202511271540-jnvrb.png (280 KB)
clipboard-202511271540-jnvrb.png |
|
Sujata Khatri, 11/27/2025 09:55 AM
|
|
|
clipboard-202511271540-e0uws.png (288 KB)
clipboard-202511271540-e0uws.png |
|
Sujata Khatri, 11/27/2025 09:55 AM
|
|
|
clipboard-202511271540-hq87p.png (101 KB)
clipboard-202511271540-hq87p.png |
|
Sujata Khatri, 11/27/2025 09:55 AM
|
|
|
clipboard-202511271540-edpjb.png (165 KB)
clipboard-202511271540-edpjb.png |
|
Sujata Khatri, 11/27/2025 09:55 AM
|
|
|
clipboard-202511271541-p0uaq.png (199 KB)
clipboard-202511271541-p0uaq.png |
|
Sujata Khatri, 11/27/2025 09:56 AM
|
|