Steps to Create and Manage Purchase Invoice (Trading Non-Trading and Mixed)
A purchase invoice is a document that records the details of goods or services purchased from a vendor, whether for trading (items bought for resale) or non-trading (expenses, assets, or services). It includes invoice number, date, vendor details, items or services, quantity, price, taxes, and total amount for inventory and accounting purposes.
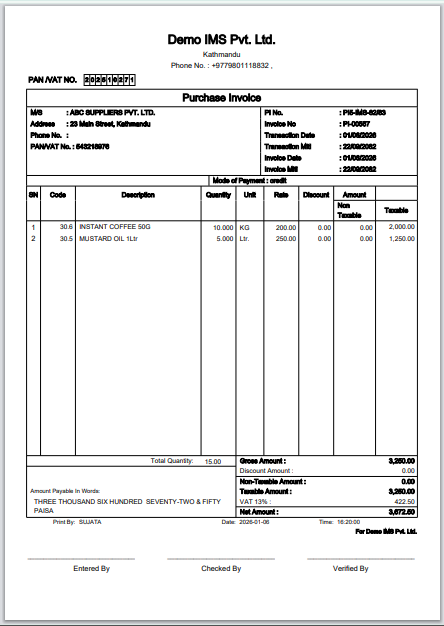
Purchase Invoice Voucher Print Format:
Steps to Create a Trading Purchase Invoice
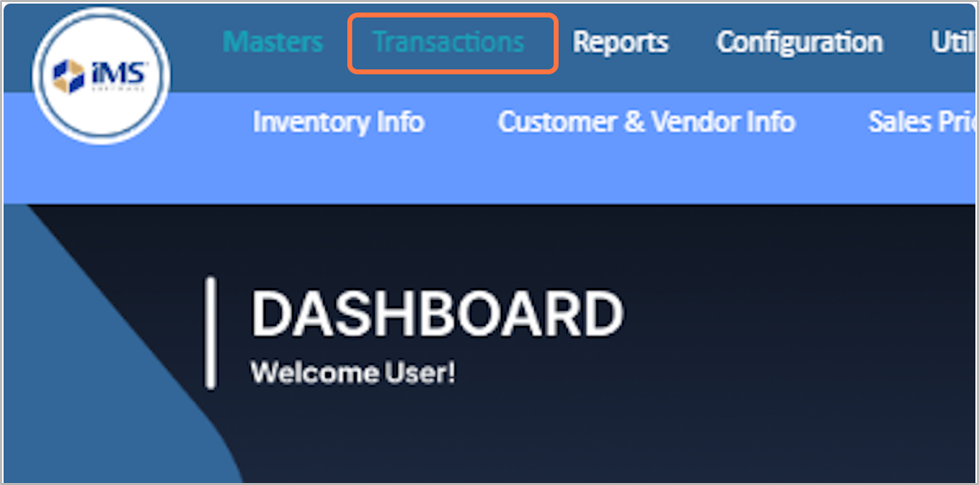
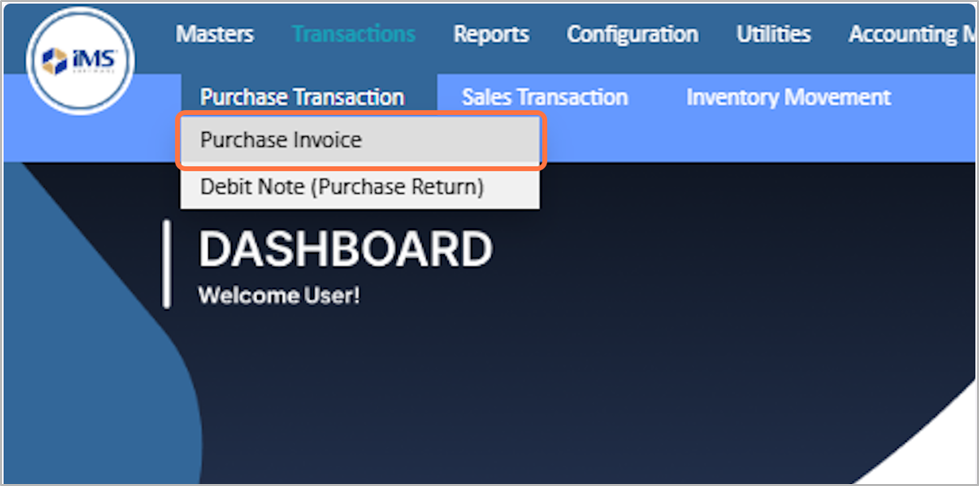
1. Go to the "Transaction" menu.
2. Click on Purchase Transaction
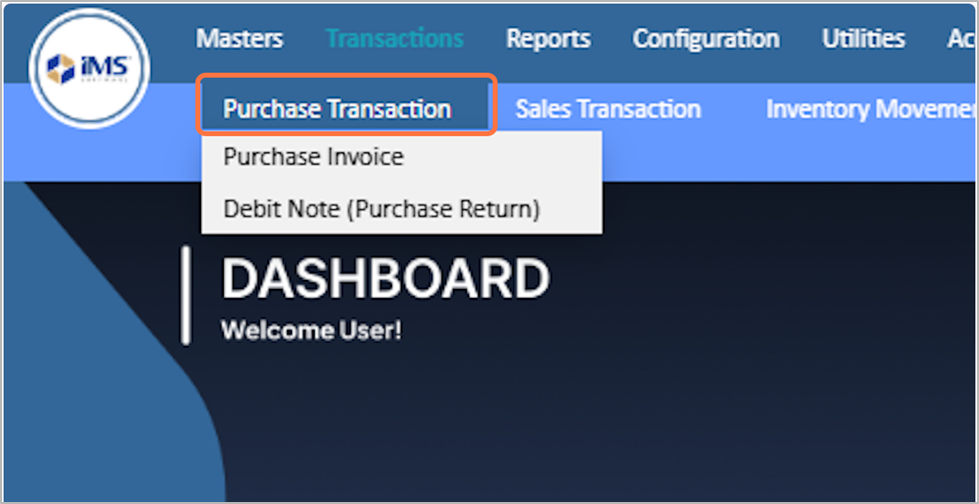
3. Select The Purchase Invoice
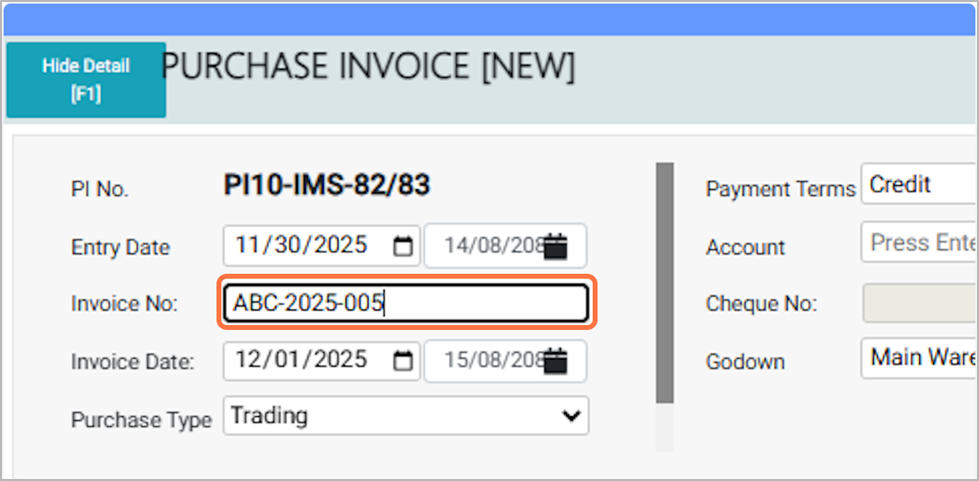
4. Enter the Entry date
- The Purchase Entry Date is the date of the purchase invoice entry, which can be edited as needed; backdating is allowed but future dates are not. Eg: 2025-11-30.

5. Enter the invoice number
Eg: BC-2025-005
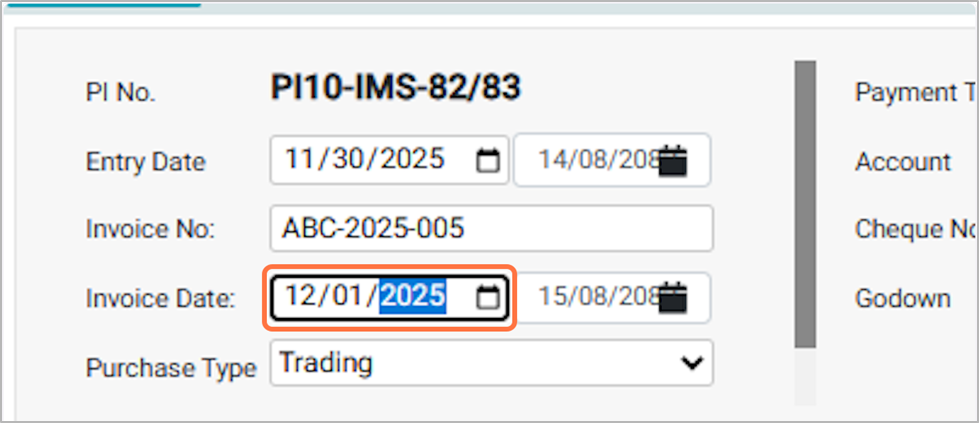
6. Choose the Invoice Date
- This is the official billing date of the purchase invoice as mentioned on the supplier’s invoice. Example: 2025-12-01
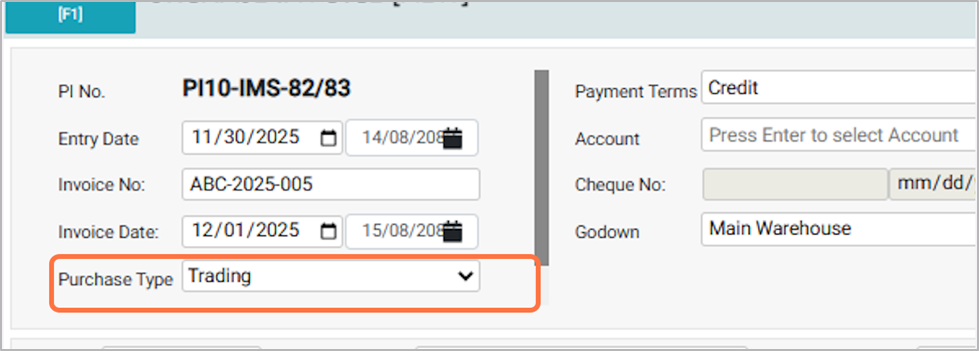
7. Choose the Purchase Type From the available option
- Trading: Select this option if you are purchasing goods intended for resale to customers. These are inventory items bought to sell for profit.
- Non-Trading: Select this option if you are purchasing goods or services not intended for resale, such as office supplies, assets, or services used for business operations.To add a non-trading purchase transaction, follow the guidance provided in this link:
http://redmine.himshang.com.np:4000/projects/dashboard-overview/wiki/Step_to_Create_And_Manage_Non-Trading_Purchase_Invoice
- Mixed: Select this voucher type when a single purchase invoice contains both trading (resale) and non-trading (expenses or assets) items. This allows you to record all items together in the same voucher.To add a non-trading purchase transaction, follow the guidance provided in this link:
http://redmine.himshang.com.np:4000/projects/dashboard-overview/wiki/Steps_To_Create_And_Manage_The_Mixed_Purchase_Transaction
- For now, we will select the voucher type as Trading.
http://redmine.himshang.com.np:4000/projects/dashboard-overview/wiki/Step_to_Create_And_Manage_Non-Trading_Purchase_Invoice
http://redmine.himshang.com.np:4000/projects/dashboard-overview/wiki/Steps_To_Create_And_Manage_The_Mixed_Purchase_Transaction
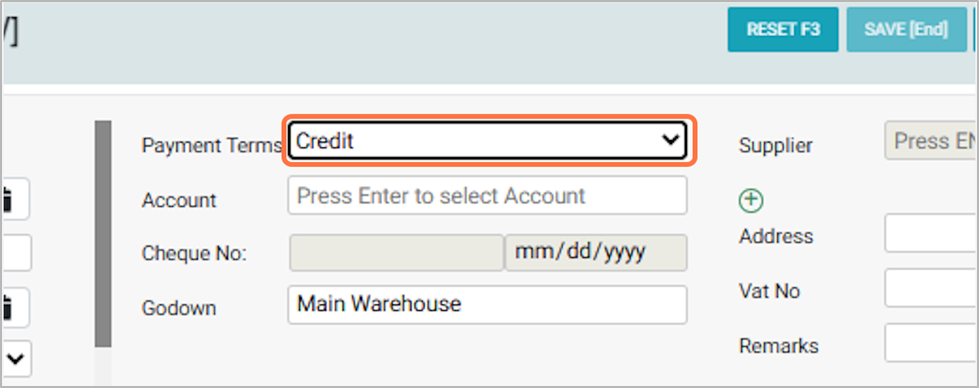
8. Select Payment Terms of purchase invoice from the available options:
- Credit: Choose this if the purchase is made on credit.
- Cash: Select this if the purchase is paid in cash.
- Cheque: Choose this if the payment is made through cheque.
- Other: Select this for any other type of payment Method
- For now, we will select the Payment Terms as Credit.
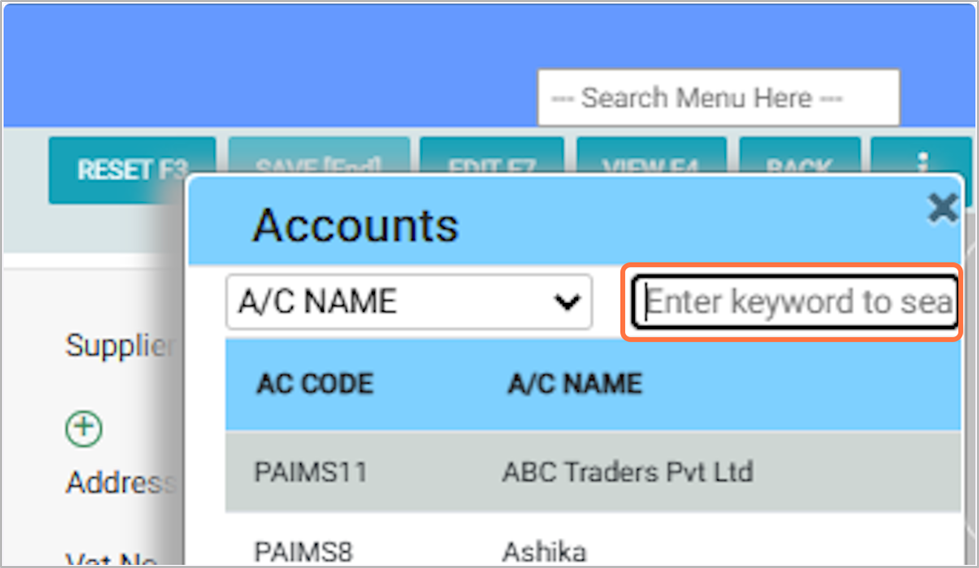
9. Click and Choose the Account:
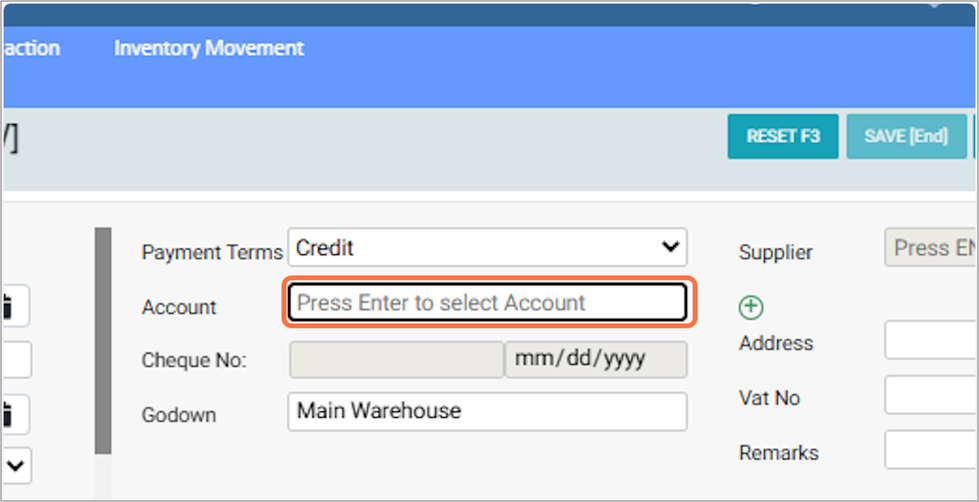
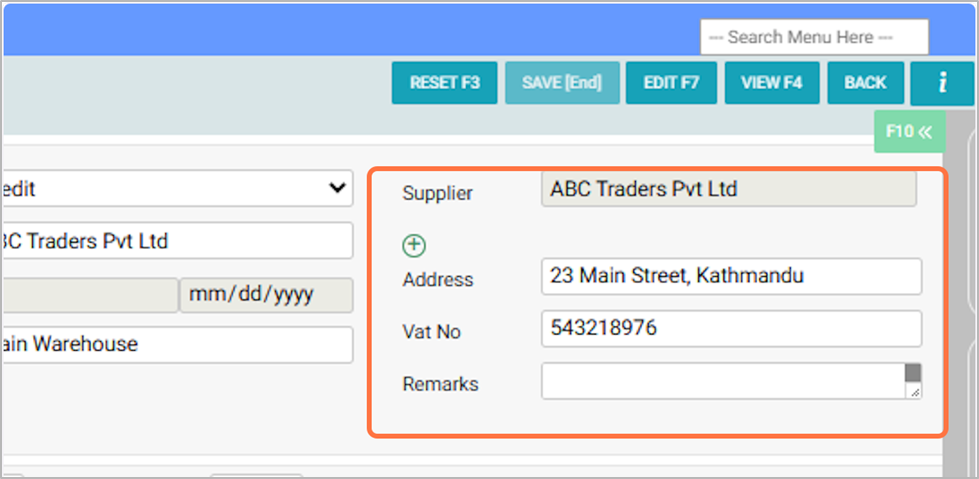
10. Select or search the supplier/vendor account as mentioned in the purchase invoice, e.g., ABC Traders Pvt Ltd.
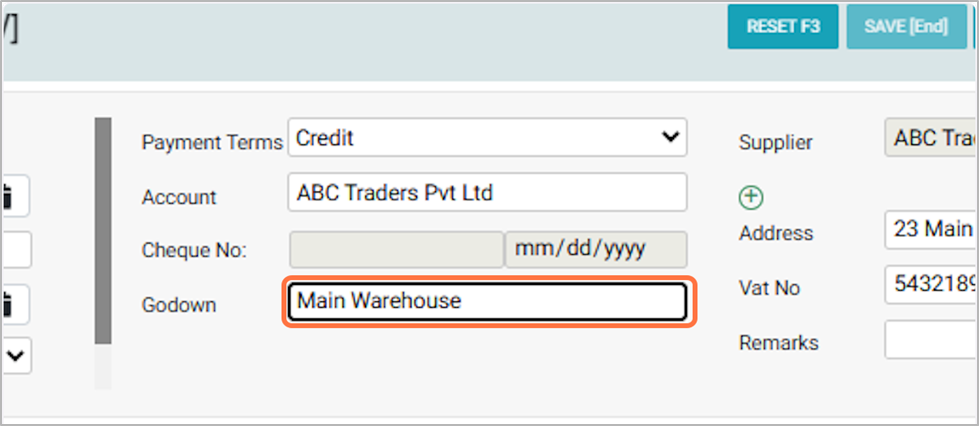
11. Select the godown
Choose the warehouse or storage location for storing the purchased items, e.g., Main Warehouse.
12. Supplier Details Field:
- Case 1:
If you select Credit, Cheque, or Other as the “payment terms”, enter the “Account” as supplier, and the “Supplier details” will be auto-filled.
- Case 2:
If you select Cash as the “payment terms”, the Account will be auto-filled as “Cash in Hand”, but you need to manually select the “supplier”.
- Add Remarks: Enter any additional notes or comments about the purchase as needed (e.g., Item 1 received 1 pcs less).
If you select Credit, Cheque, or Other as the “payment terms”, enter the “Account” as supplier, and the “Supplier details” will be auto-filled.
If you select Cash as the “payment terms”, the Account will be auto-filled as “Cash in Hand”, but you need to manually select the “supplier”.
13. Enter the product barcode number if you want to purchase the product through the barcode, then enter the quantity and save it. For E.g., "8751.1"

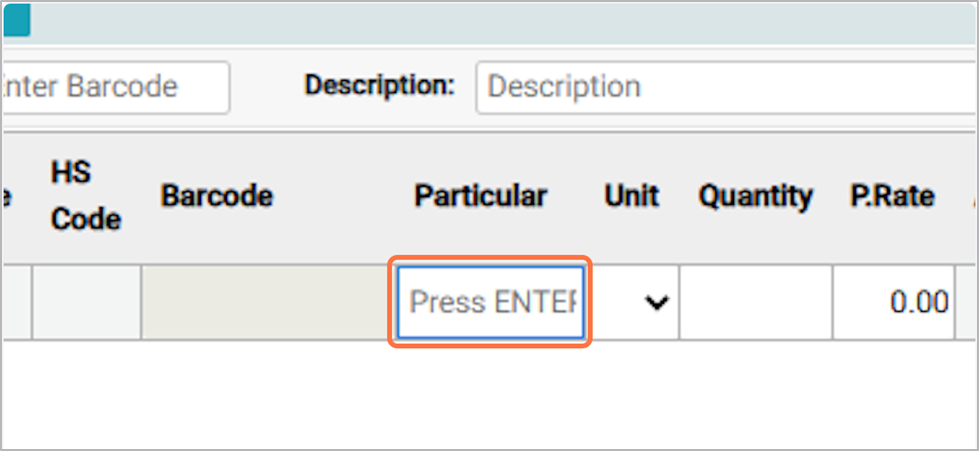
14. For Manual Entry, Click in the Particular Field:
Click Enter in the Particular field to select the item you want to purchase.
15. Uncheck “Supplier Wise Items” in the pop-up to display all products instead of only supplier-wise items.
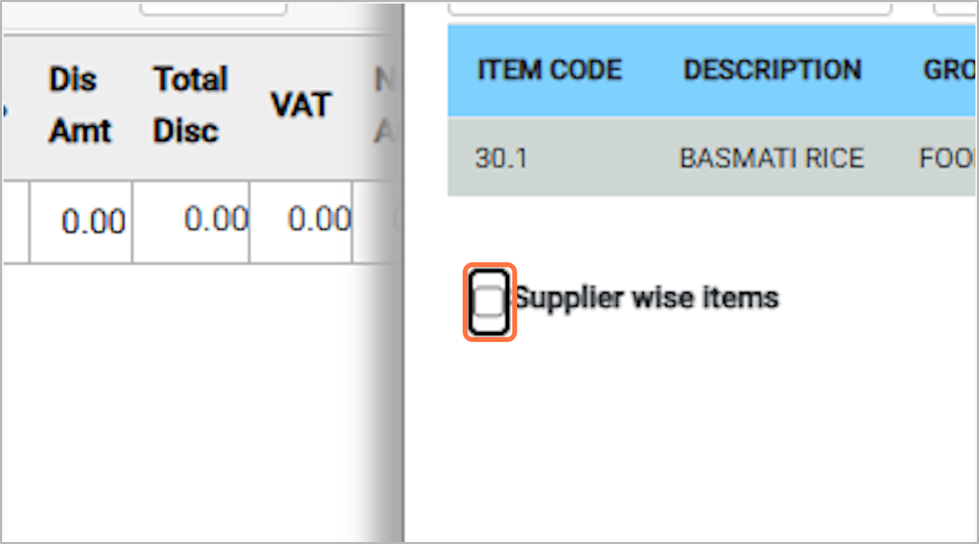
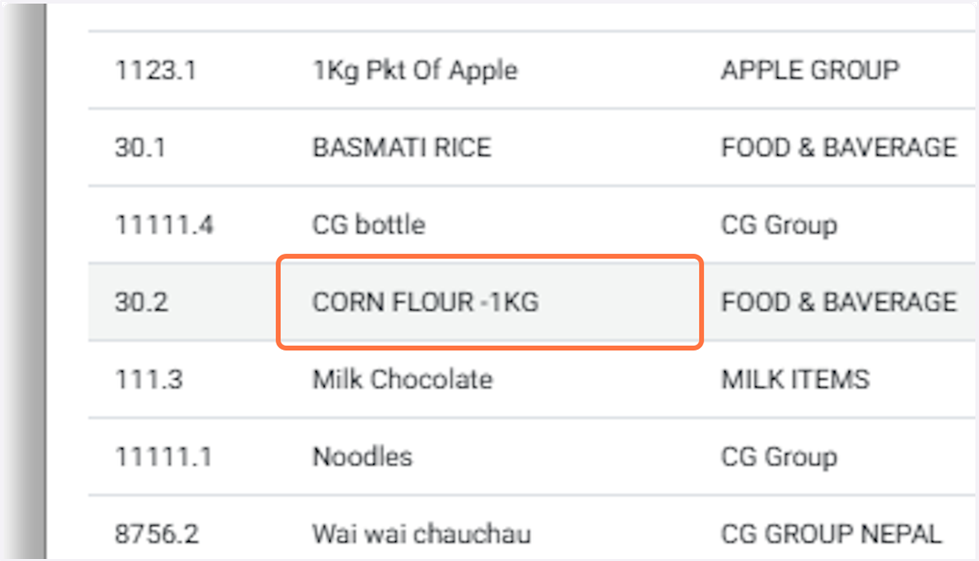
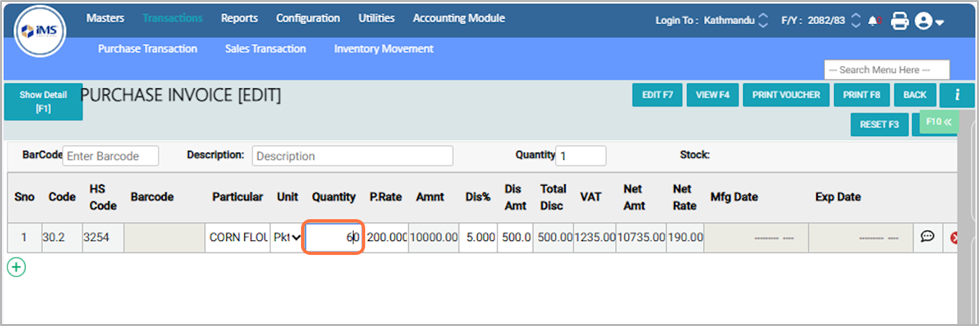
16. Select the product you want to purchase from the list, for eg: Cornflour – 1 KG.
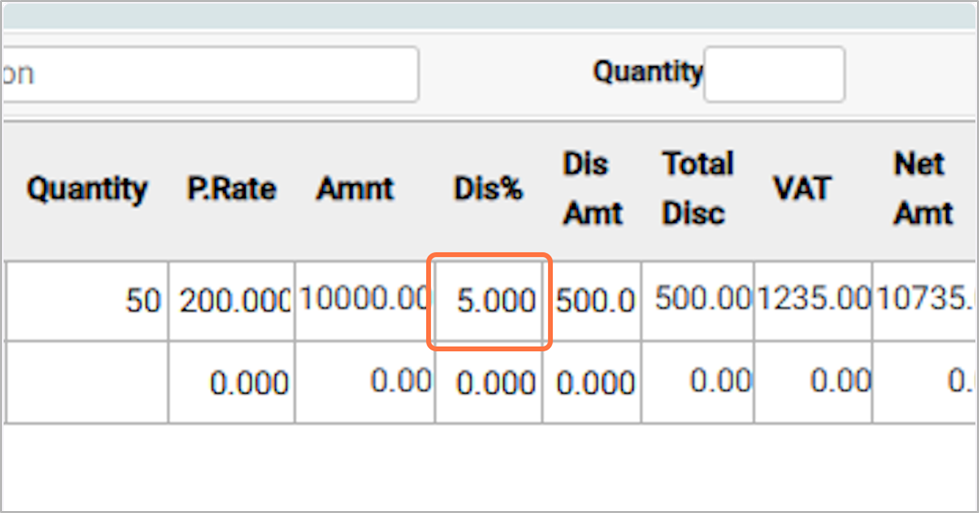
17. Enter the number or quantity of the product you want to purchase.For Eg: 50

18. If the supplier is giving a discount, type the discount percentage in this field. for Eg: 5
19. After entering all required details, click Save to record the purchase in the system.
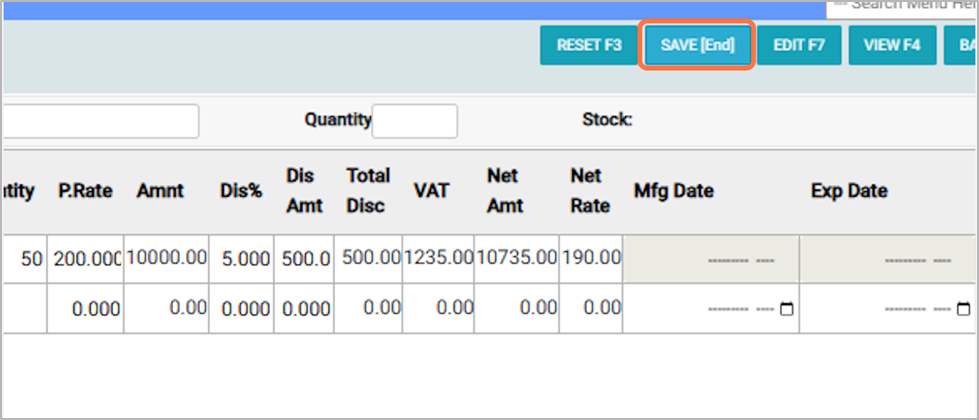
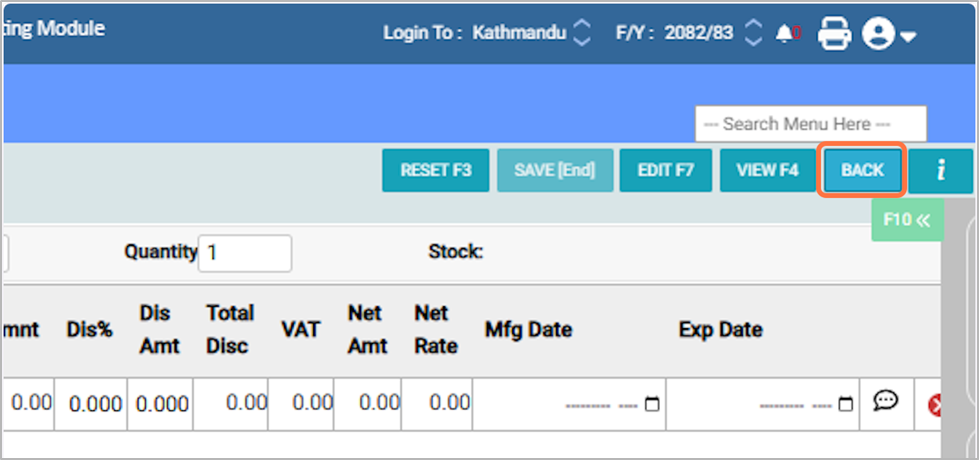
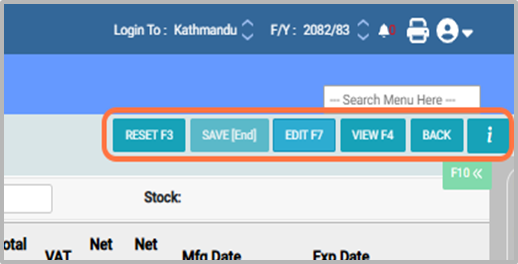
20. Buttons in Purchase Entry:
- Reset: Clears all fields so you can start entering the purchase again.
- Save: Saves the purchase entry in the system.
- Edit: Allows you to modify an existing purchase entry.
- View: Lets you see the details of a purchase entry without making changes.
- Back: Returns you to the main menu or previous screen.
21. Press F7 or click Edit to modify the details of an existing purchase entry.
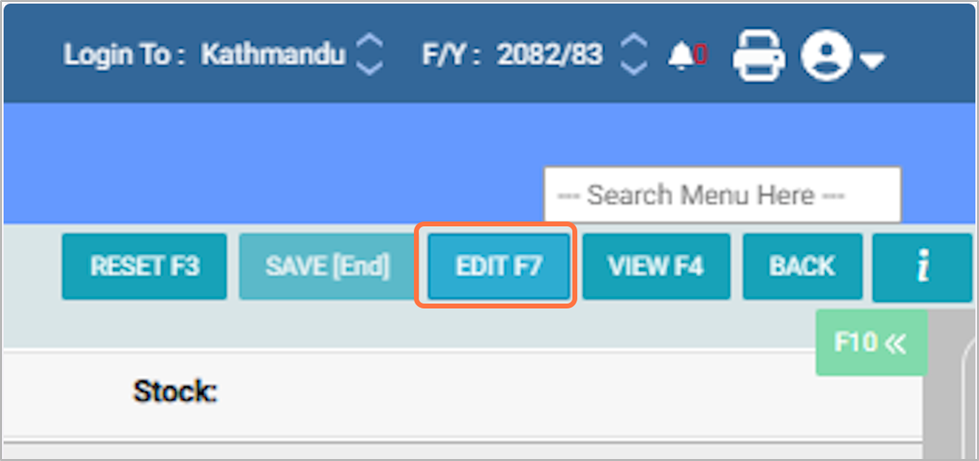
22. Select the invoice bill number from the list that you want to edit.For Eg: ABC-2025-005
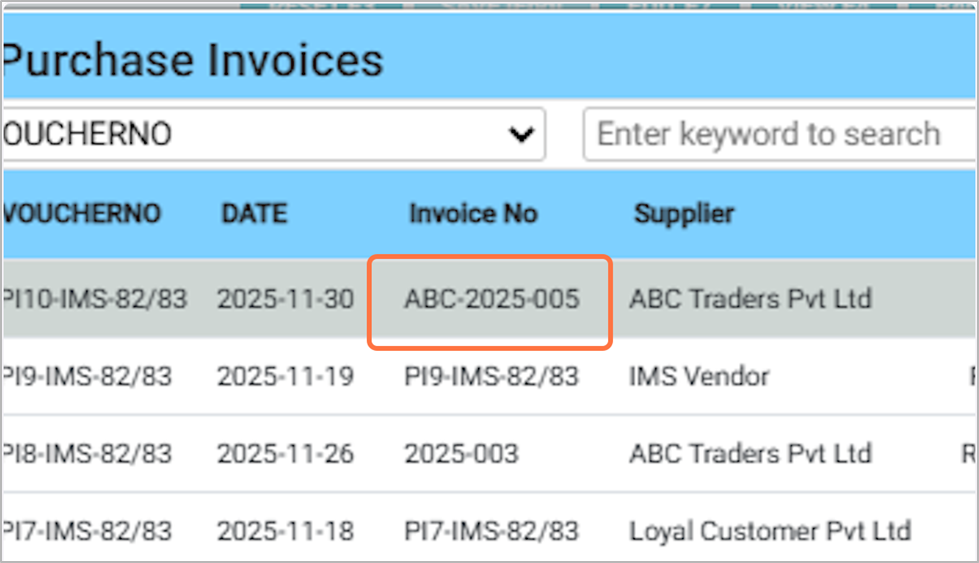
23. Edit the purchase details as needed and click the Save button to update the entry.
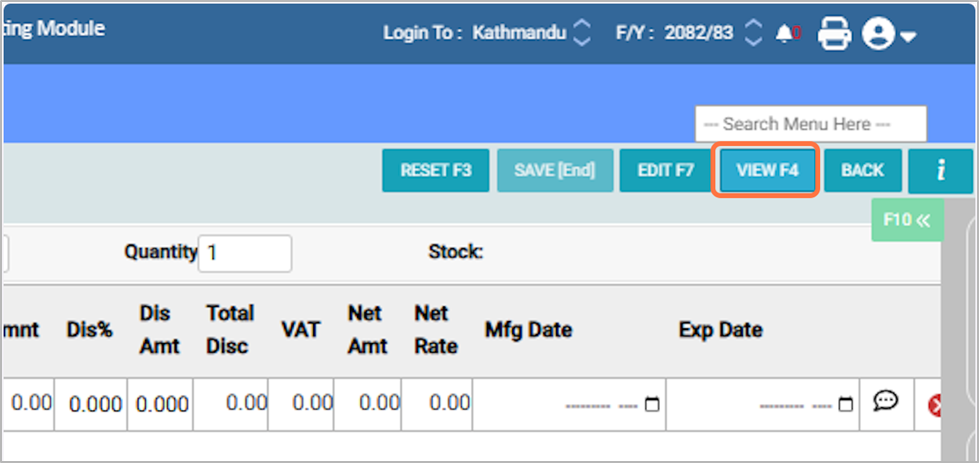
24. Press F4 or click View to see the details of a purchase entry. After viewing, click Back to return to the main screen.
25. Click the Back button to return to the main screen.