|
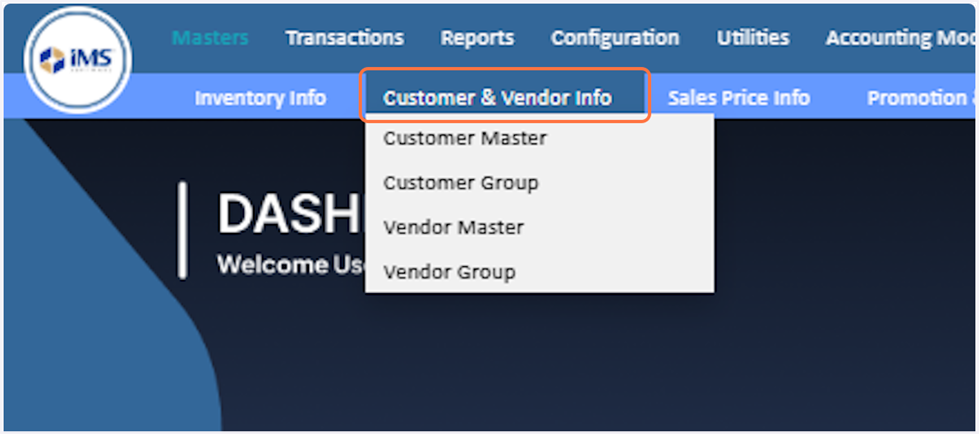
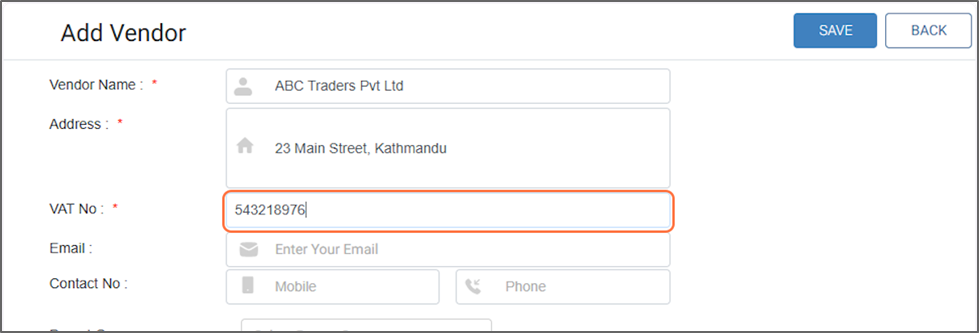
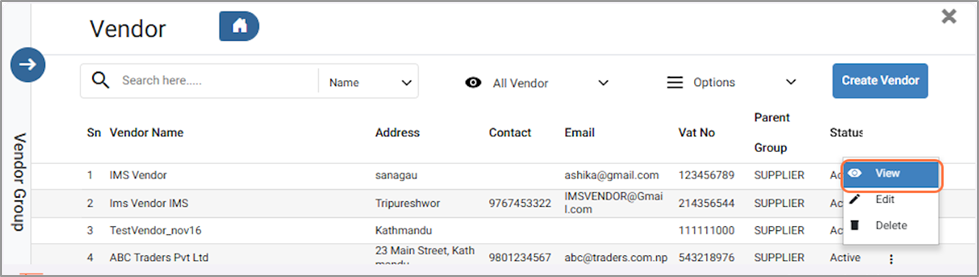
clipboard-202601051305-txk7h.png (263 KB)
clipboard-202601051305-txk7h.png |
|
Sujata Khatri, 01/05/2026 07:20 AM
|
|
|
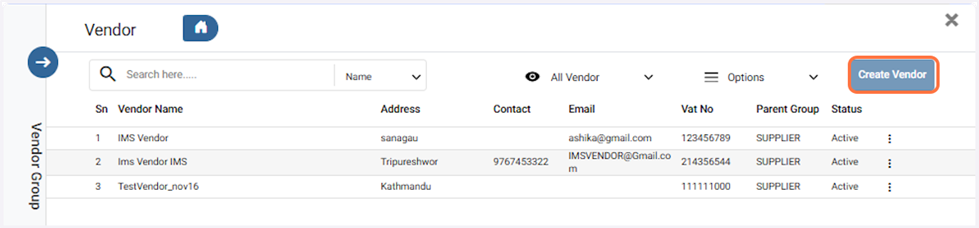
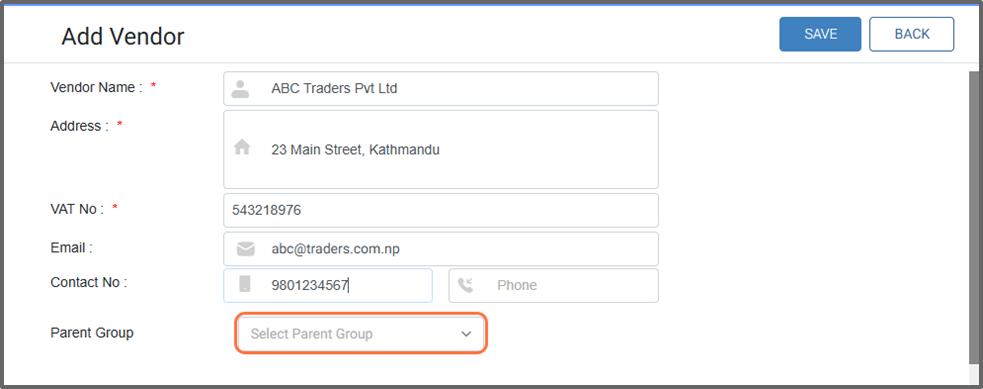
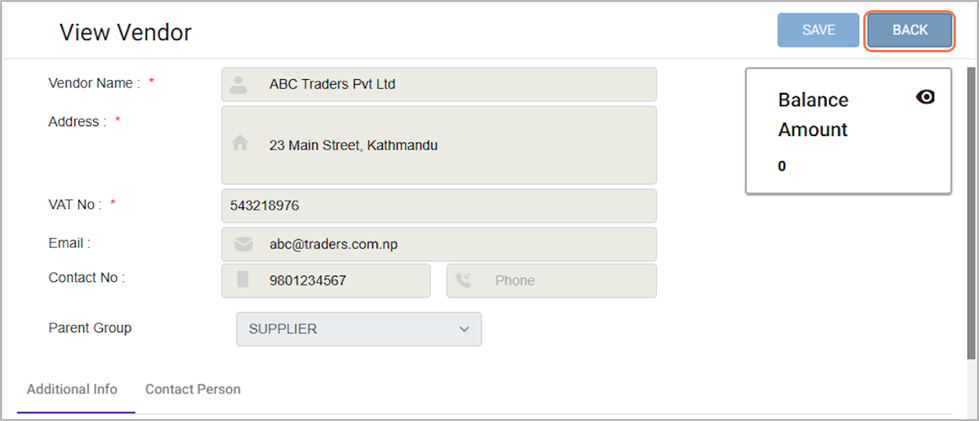
clipboard-202601051305-g7nap.png (218 KB)
clipboard-202601051305-g7nap.png |
|
Sujata Khatri, 01/05/2026 07:20 AM
|
|
|
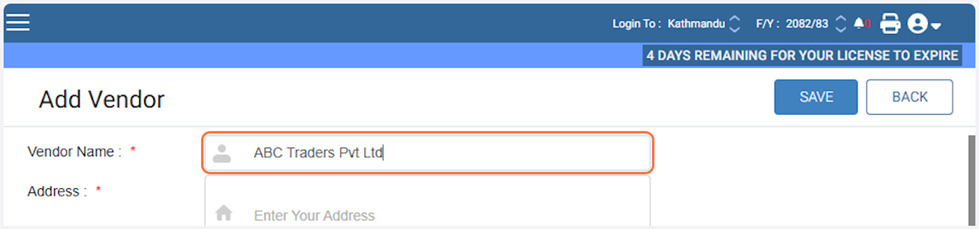
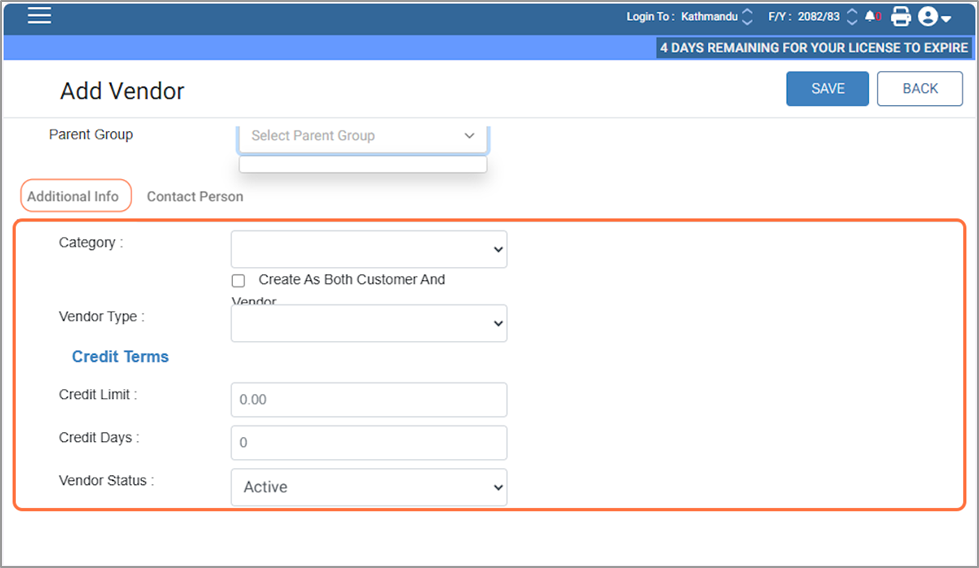
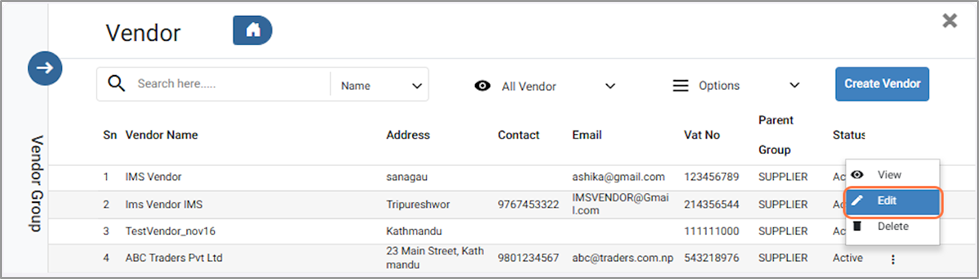
clipboard-202601051305-ebbrh.png (171 KB)
clipboard-202601051305-ebbrh.png |
|
Sujata Khatri, 01/05/2026 07:20 AM
|
|
|
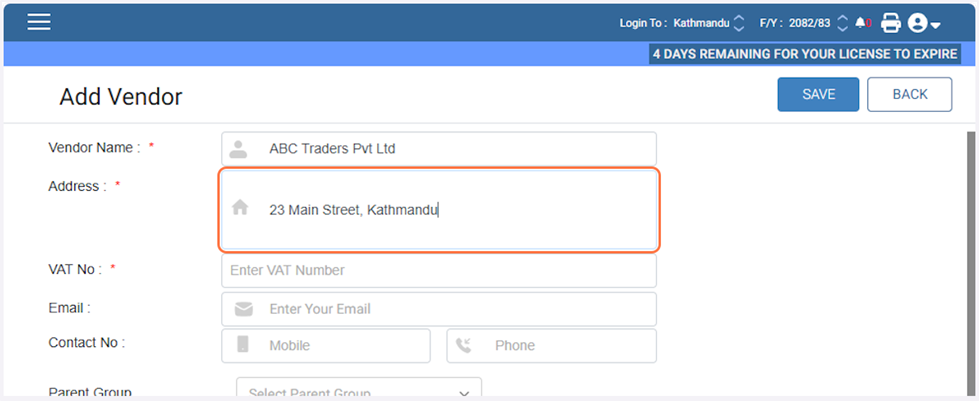
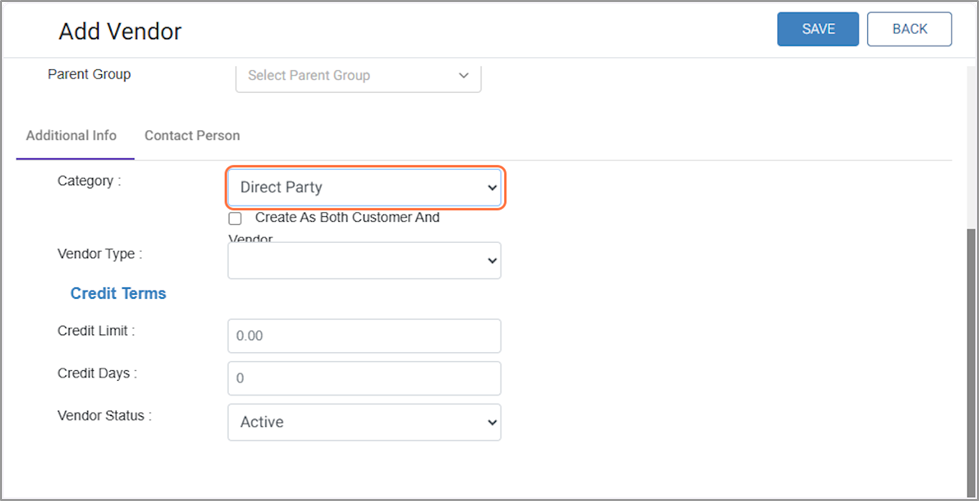
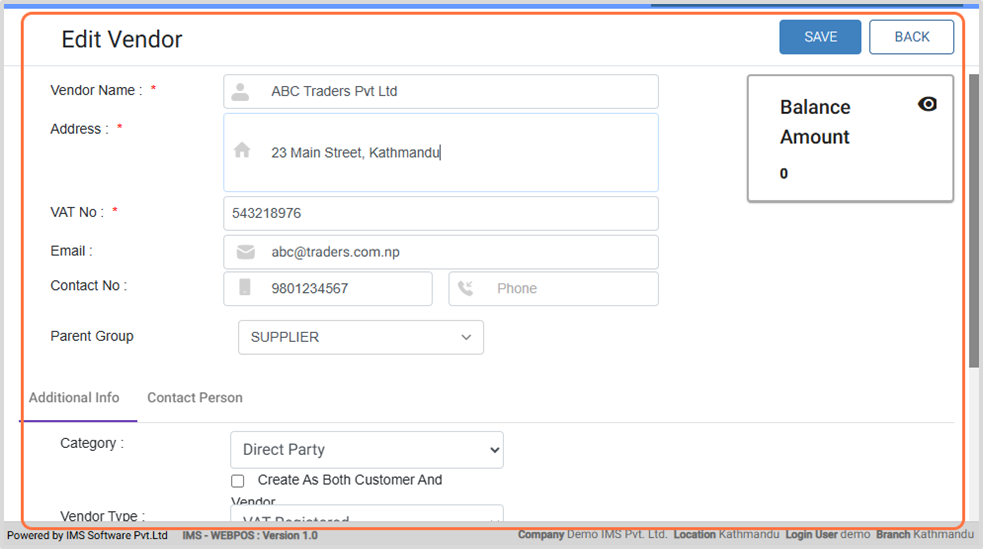
clipboard-202601051306-9y3sk.png (62.8 KB)
clipboard-202601051306-9y3sk.png |
|
Sujata Khatri, 01/05/2026 07:21 AM
|
|
|
clipboard-202601051306-alodi.png (54.5 KB)
clipboard-202601051306-alodi.png |
|
Sujata Khatri, 01/05/2026 07:21 AM
|
|
|
clipboard-202601051306-ahn0l.png (80 KB)
clipboard-202601051306-ahn0l.png |
|
Sujata Khatri, 01/05/2026 07:21 AM
|
|
|
clipboard-202601051306-07tdp.png (47.7 KB)
clipboard-202601051306-07tdp.png |
|
Sujata Khatri, 01/05/2026 07:21 AM
|
|
|
clipboard-202601051307-aj3gm.png (50.3 KB)
clipboard-202601051307-aj3gm.png |
|
Sujata Khatri, 01/05/2026 07:22 AM
|
|
|
clipboard-202601051307-pssuc.png (51.3 KB)
clipboard-202601051307-pssuc.png |
|
Sujata Khatri, 01/05/2026 07:22 AM
|
|
|
clipboard-202601051307-pdvvm.png (52.8 KB)
clipboard-202601051307-pdvvm.png |
|
Sujata Khatri, 01/05/2026 07:22 AM
|
|
|
clipboard-202601051307-cvl7b.png (86.6 KB)
clipboard-202601051307-cvl7b.png |
|
Sujata Khatri, 01/05/2026 07:22 AM
|
|
|
clipboard-202601051307-m2y0v.png (56.2 KB)
clipboard-202601051307-m2y0v.png |
|
Sujata Khatri, 01/05/2026 07:22 AM
|
|
|
clipboard-202601051308-sl0kg.png (39.3 KB)
clipboard-202601051308-sl0kg.png |
|
Sujata Khatri, 01/05/2026 07:23 AM
|
|
|
clipboard-202601051308-jc401.png (61.3 KB)
clipboard-202601051308-jc401.png |
|
Sujata Khatri, 01/05/2026 07:23 AM
|
|
|
clipboard-202601051308-otlpr.png (50 KB)
clipboard-202601051308-otlpr.png |
|
Sujata Khatri, 01/05/2026 07:23 AM
|
|
|
clipboard-202601051308-mkfnd.png (35.9 KB)
clipboard-202601051308-mkfnd.png |
|
Sujata Khatri, 01/05/2026 07:23 AM
|
|
|
clipboard-202601051308-moqpe.png (37.7 KB)
clipboard-202601051308-moqpe.png |
|
Sujata Khatri, 01/05/2026 07:23 AM
|
|
|
clipboard-202601051308-uaqve.png (86.2 KB)
clipboard-202601051308-uaqve.png |
|
Sujata Khatri, 01/05/2026 07:23 AM
|
|
|
clipboard-202601051309-zx3hw.png (99.8 KB)
clipboard-202601051309-zx3hw.png |
|
Sujata Khatri, 01/05/2026 07:24 AM
|
|
|
clipboard-202601051309-uwpal.png (75.7 KB)
clipboard-202601051309-uwpal.png |
|
Sujata Khatri, 01/05/2026 07:24 AM
|
|
|
clipboard-202601051309-wsybl.png (97.1 KB)
clipboard-202601051309-wsybl.png |
|
Sujata Khatri, 01/05/2026 07:24 AM
|
|
|
clipboard-202601051309-hkbmn.png (103 KB)
clipboard-202601051309-hkbmn.png |
|
Sujata Khatri, 01/05/2026 07:24 AM
|
|
|
clipboard-202601051309-vsi9u.png (80.1 KB)
clipboard-202601051309-vsi9u.png |
|
Sujata Khatri, 01/05/2026 07:24 AM
|
|
|
clipboard-202601051311-anvat.png (65.4 KB)
clipboard-202601051311-anvat.png |
|
Sujata Khatri, 01/05/2026 07:26 AM
|
|