Additional Costing voucher
Step to ‘Create Additional voucher’
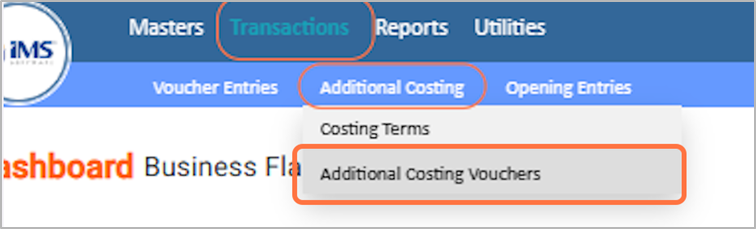
1.From the ‘transaction menu’,under the ‘additional costing’ choose the ‘costing terms’
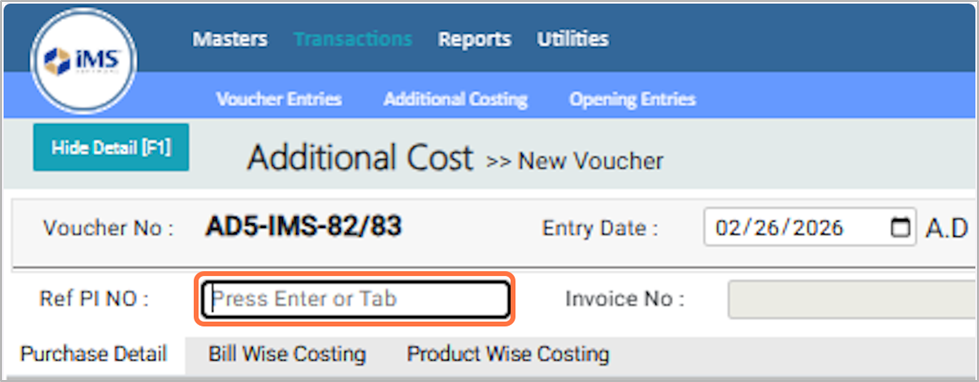
2.In the ‘Reference PI Number (Ref-PI-No)’ field, press Enter and select the relevant ‘Import Purchase Invoice’ to map the ‘Additional Costing Term’.
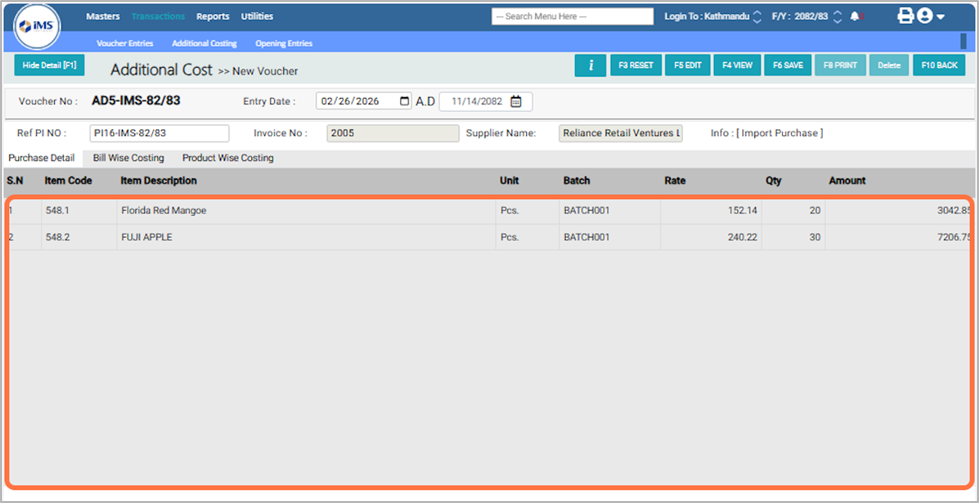
3.From the Pop Up list, select the relevant Import Invoice to map the Additional Costing details. For eg: 2026-02-25
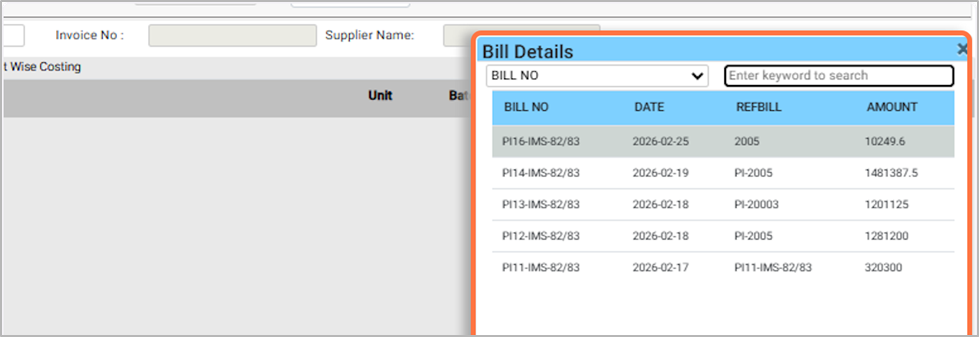
4.After selecting the Import Invoice Reference Bill Number, the corresponding Purchase Product details will be loaded.
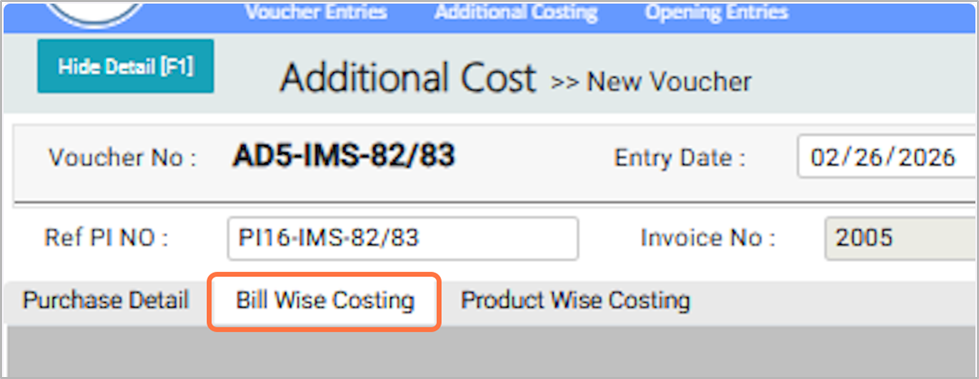
5.After the import purchase details are loaded,Click on ‘Bill Wise Costing’.
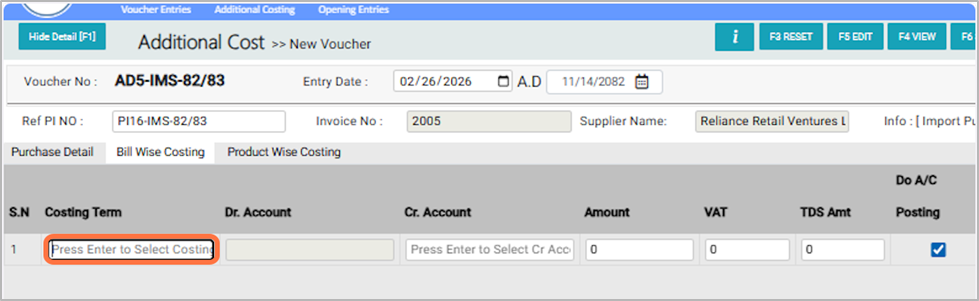
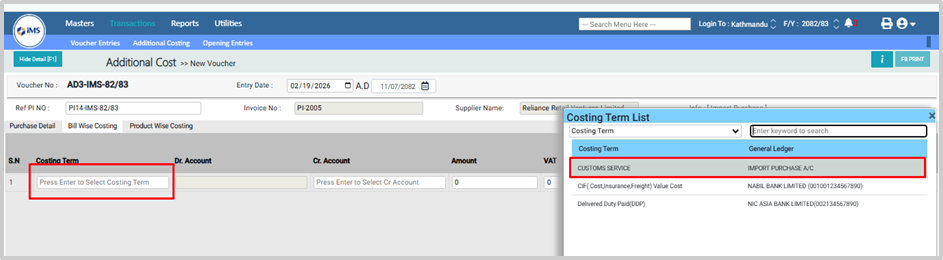
6. Press Enter in the Costing Terms field to map ‘bill-wise additional costing’.
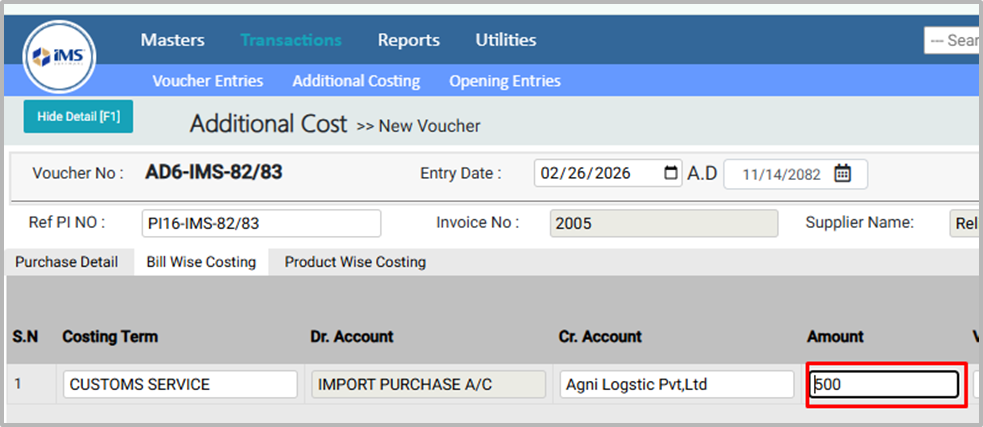
7. select the required term from the pop-up list (the pop-up will appear only if the Bill Wise option is ticked while creating the costing terms). For example CUSTOMS SERVICE.
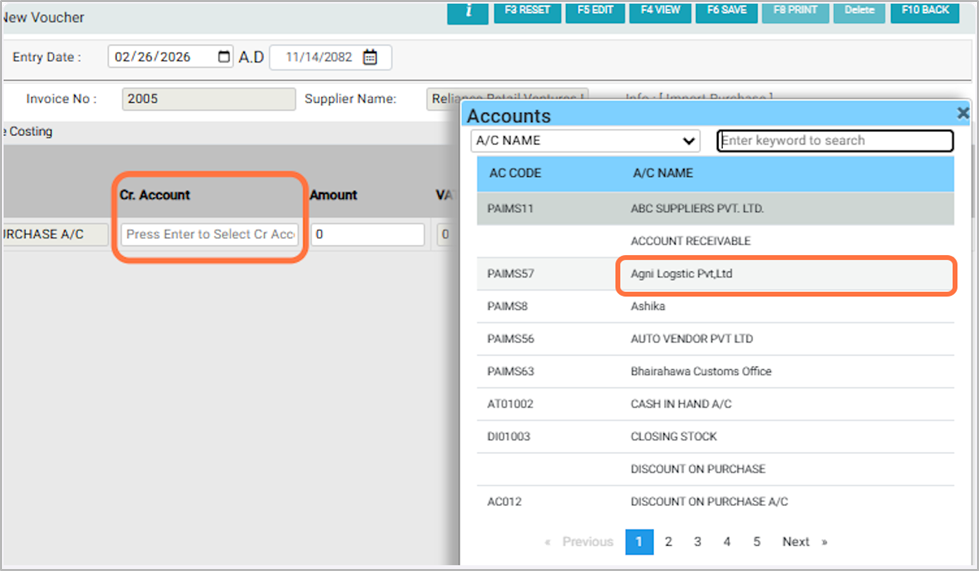
8. In the ‘Cr Account’ field, choose the ledger account from which the amount for that costing will be paid (for example, Agni Logistic Pvt. Ltd.)
9. Enter the amount for the selected costing term. For ‘example 500’
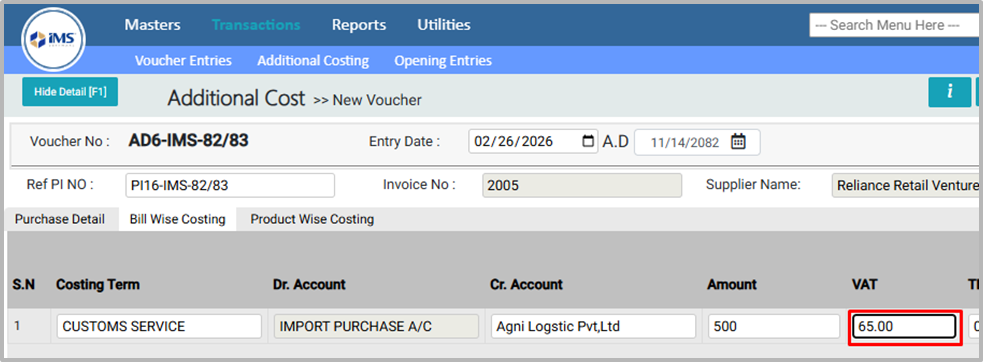
10. In the VAT section, the system will automatically calculate 13% VAT on the costing term if “Is Import Document Costing Terms” was unticked during costing term creation. If it was ticked, you can enter the VAT amount manually.
To declare who will pay the VAT, follow these simple steps:
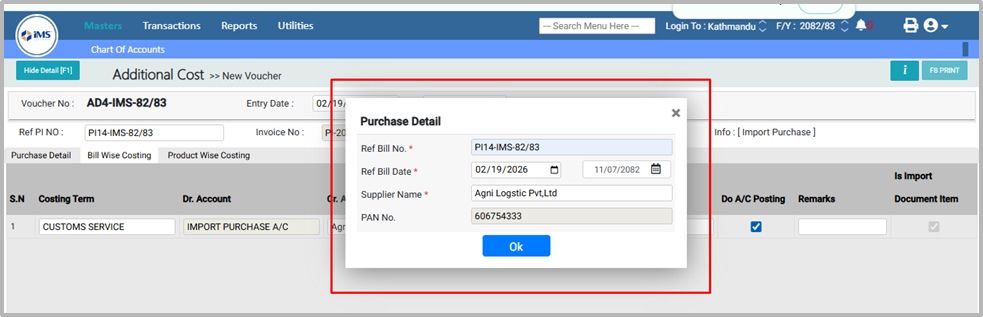
●Enter the Import Purchase Ref Bill No.
●Enter the Ref Bill Date (in both English and Nepali).
●Enter the Supplier Name.
●Enter the Supplier PAN Number.
11.Enter the TDS Amount.
12.Do A/C Posting decides if a transaction will affect your accounting records:
●Tick Do A/C Posting – The entry will update accounts and ledgers automatically (e.g., Purchase Account, VAT Account).
●Untick Do A/C Posting – The entry will be saved in the system but won’t affect any accounts, useful for reference or reports.
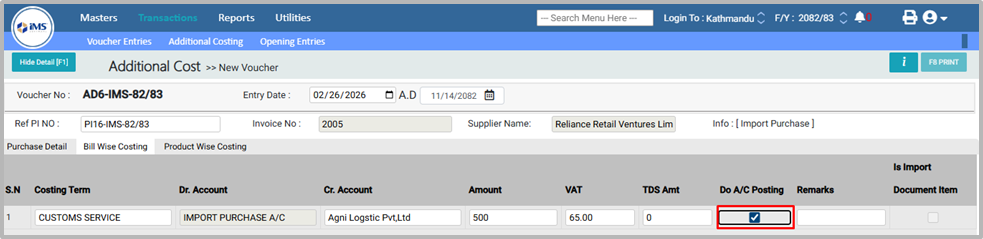
13.You can enter any additional notes or comments in the Remarks field.

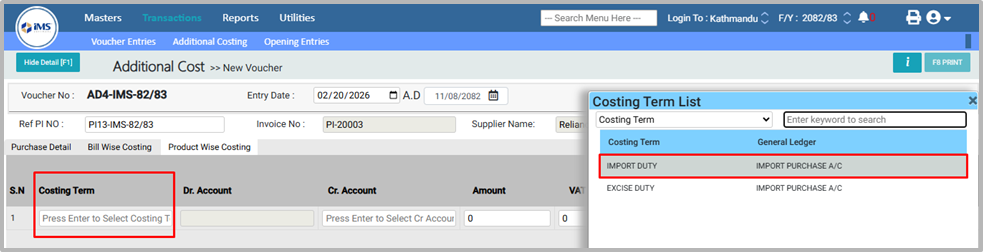
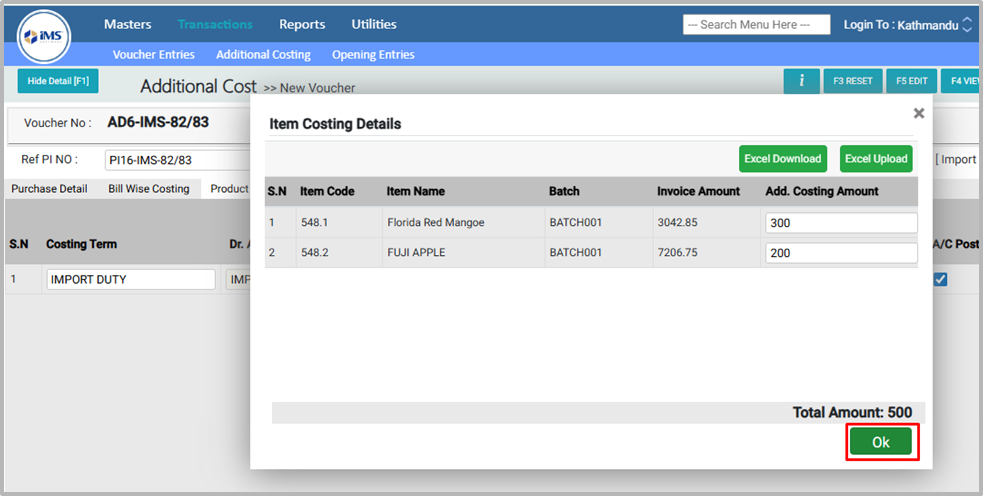
14.Navigate to Product Wise Costing to map the costing to individual products.
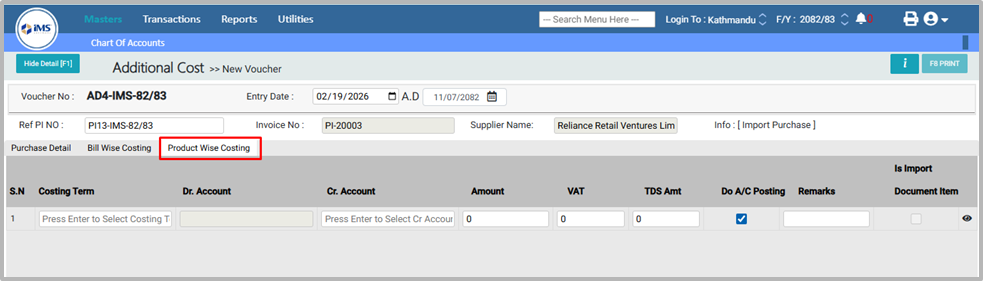
15.Press Enter in the Costing Terms field and select the required term (e.g., Import Duty) from the pop-up list; the pop-up will appear only if the Product Wise or Both option is ticked while creating the costing terms.
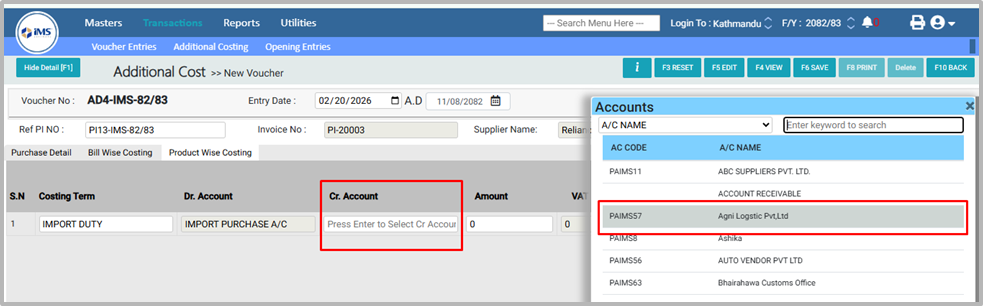
16.In the Cr Account field, choose the ledger account from which the amount for that costing will be paid (for example, Agni Logistic Pvt. Ltd.)
17.In the Amount field, press Enter and add the additional costing terms individually for each product.
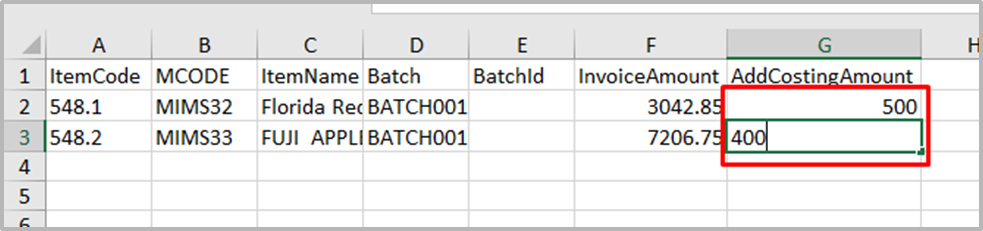
18.or You can upload the additional cost through Excel Upload; for that, click on the Excel Download button

19.Open the downloaded product list in Excel, enter the additional cost for each individual product, and then save the file.
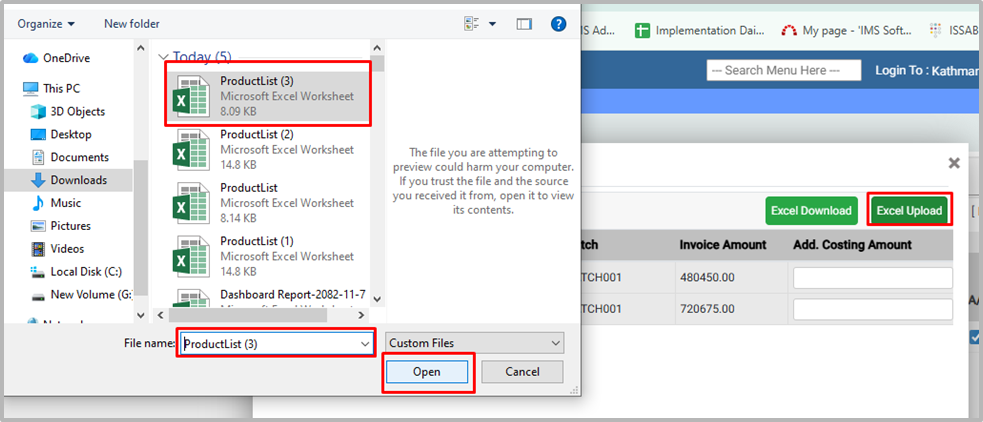
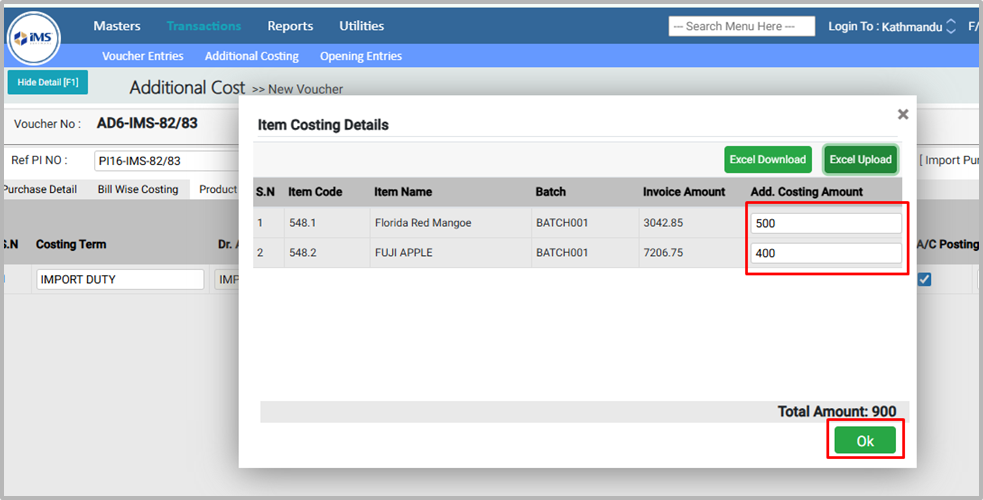
20.Go back to the system, click on the Excel Upload button, select the saved file, and the amount will be reflected product-wise.
21.You can edit the amount if needed; otherwise, click the OK button to confirm.
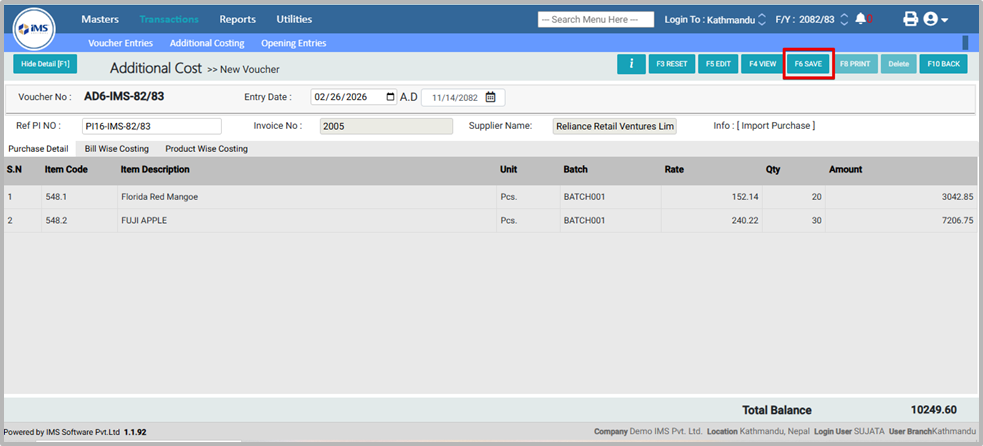
22.Click on the Save button to save the voucher with the additional cost.
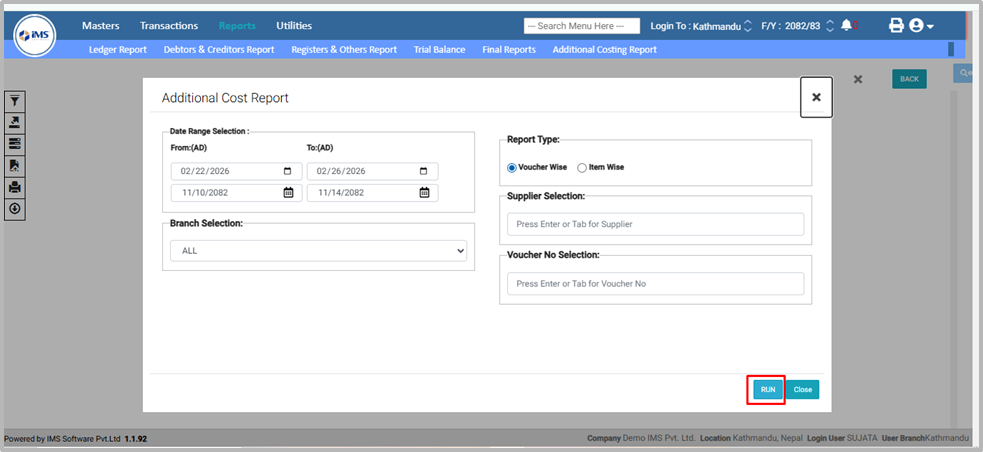
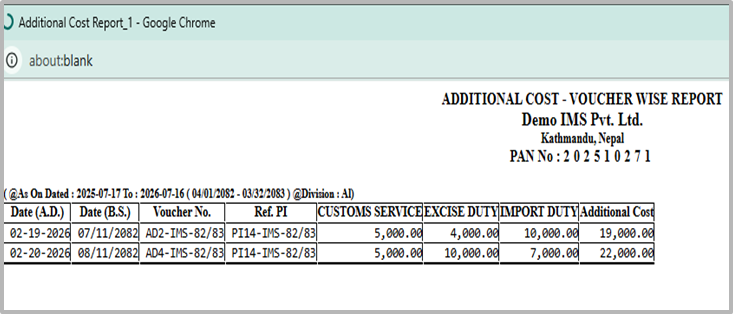
23.To view the additional cost report, go to the Report section and select the Additional Costing Report option.

24.Click on the Run button to generate the Additional Costing Report.
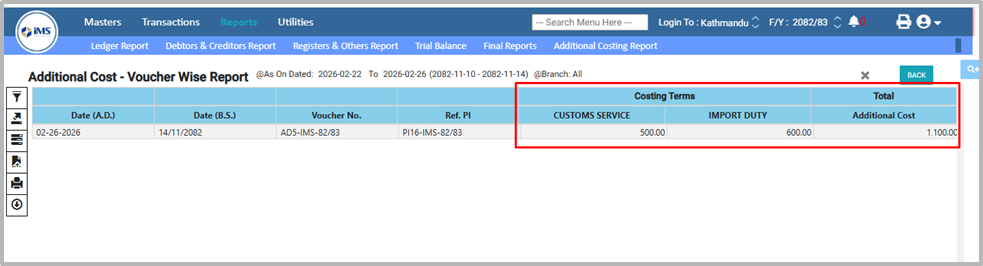
25.Additional Costing report Loaded:
26.Apply filters to customize the report:
●Date Range: Select the Start Date and End Date in BS or AD to generate a date-wise report.
●Branch Name: Choose the branch to generate a branch-specific report.
●Report Type: Tick Voucher Wise or Item Wise as per your requirement.
●Supplier: Select a supplier if you want a supplier-wise report.
●Voucher Selection: Click Enter in the voucher field and choose the voucher you need.
●Click the Run button to generate the Additional Cost Report with selected filters.
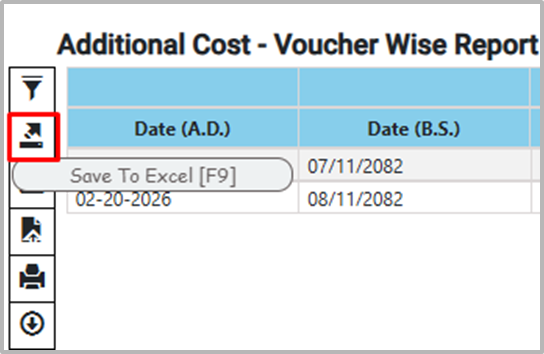
27. Click the arrow icon or press F9 to save the report as an Excel sheet and choose the download format as either “Default” or “Minimal.”
28.Click on the Options (Filter) icon. From Report Format, you can customize and format the report according to your needs.
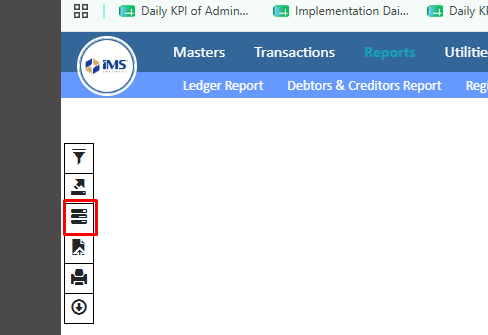
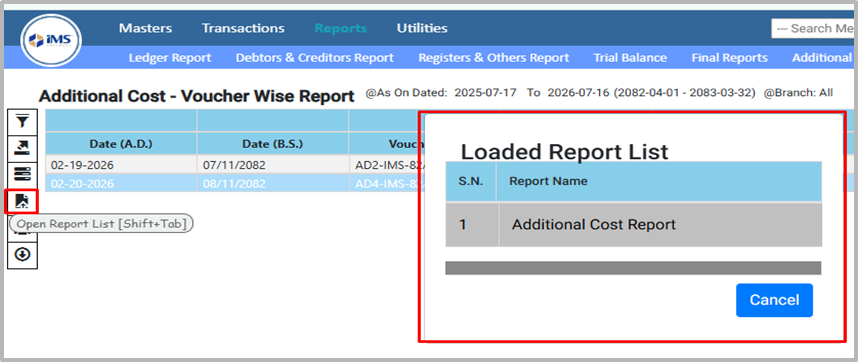
29.To open the Report List, click the File icon or press Shift + Tab, then choose the required report name to view the report.
30.Click on the Print button to print the report.
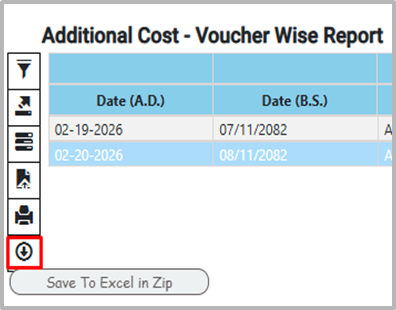
31.Click on the Download icon to download the report as a ZIP file.
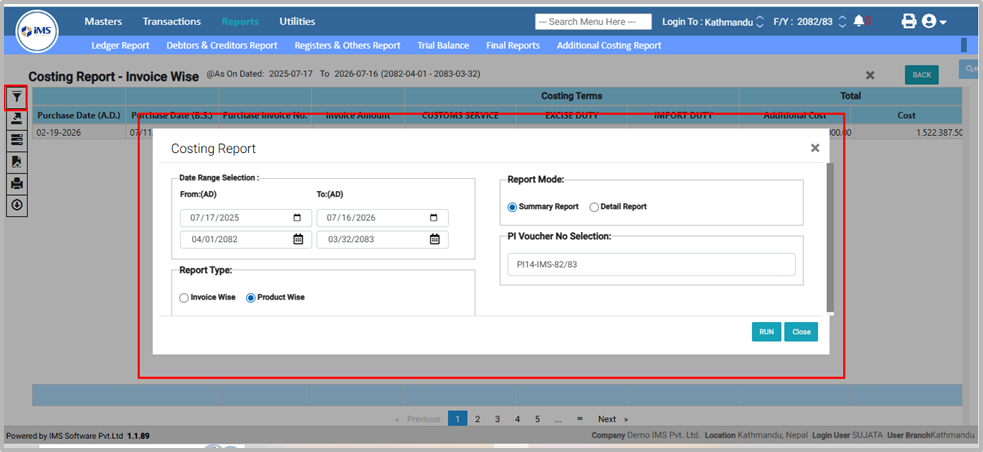
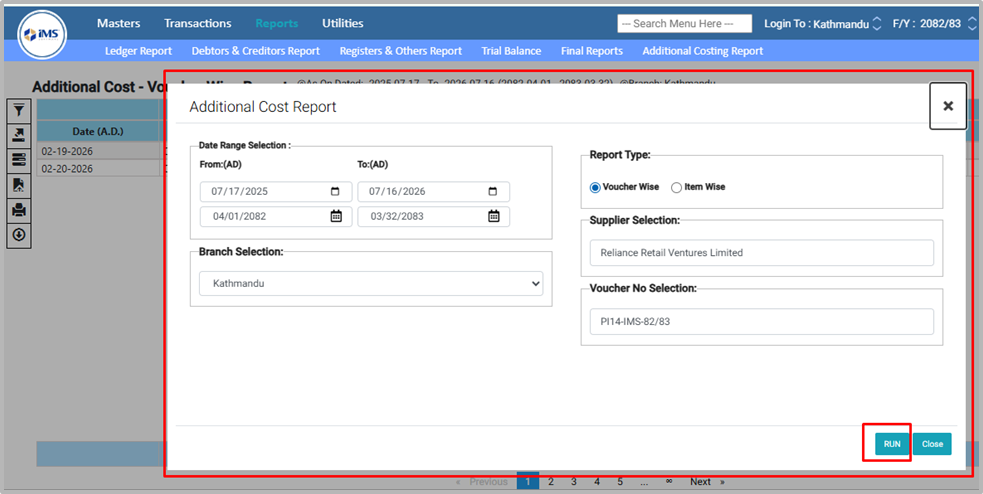
32.To view the additional cost report, go to the Report section and select the Additional Costing Report option.

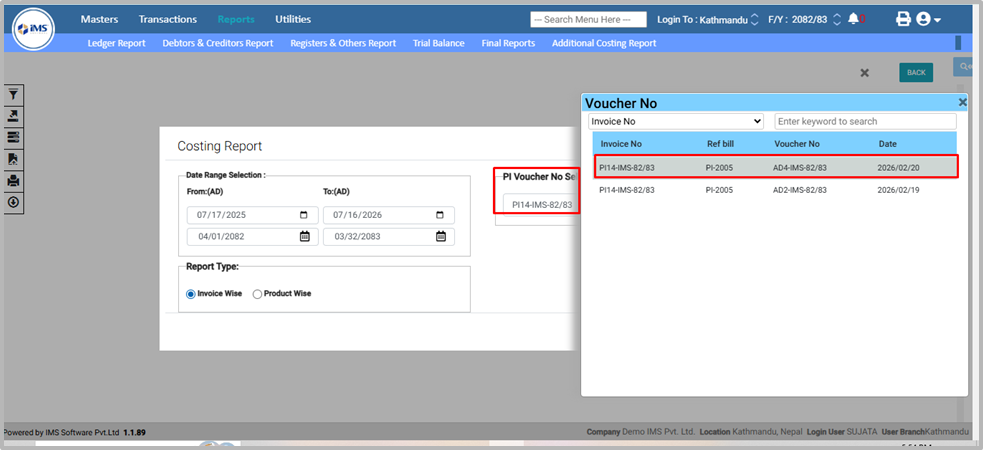
33.In PI Voucher No Selection, press Enter and choose the required voucher from the pop-up Purchase Invoice list. Then click the Run button to generate the Additional Costing Report.
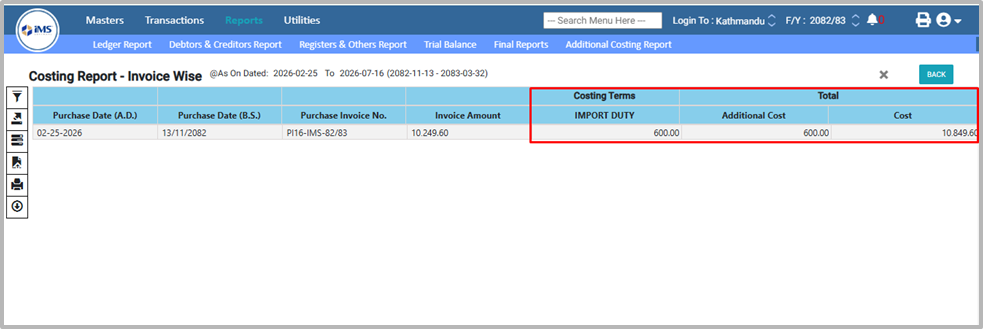
34.The Costing Report is loaded successfully
35.Apply filters to customize the report:
● Date Range – Select the Start Date and End Date (BS or AD) to generate a date-wise report.
● Report Type – Choose Voucher Wise or Product Wise as required. If you select Product Wise, choose either Summary or Detail report.
● PI Voucher Selection – Press Enter and select the required PI voucher as needed.
● click the Run button to generate the Costing Terms Report based on the selected filters.