|
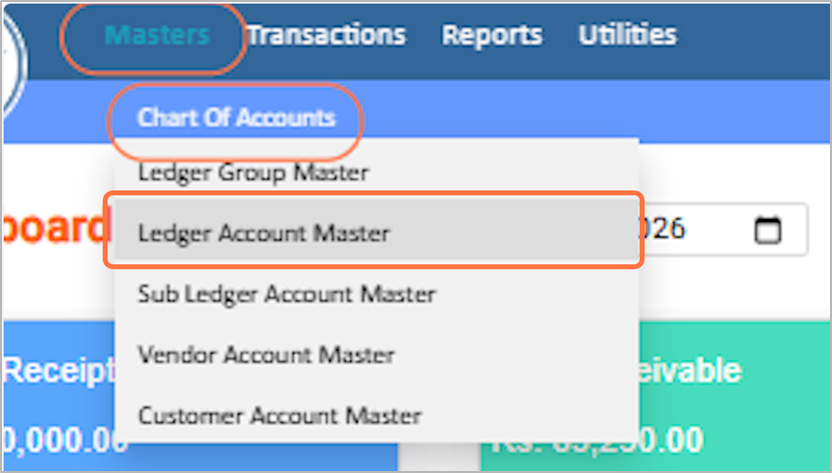
clipboard-202605291142-b6zp7.png (81.2 KB)
clipboard-202605291142-b6zp7.png |
|
Sujata Khatri, 05/29/2026 05:57 AM
|
|
|
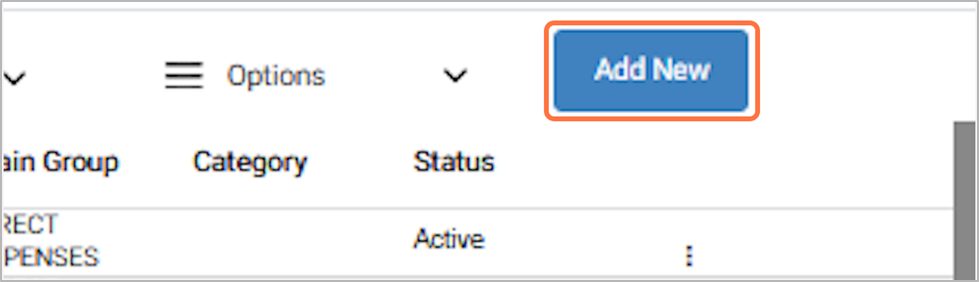
clipboard-202605291142-ououk.png (51.3 KB)
clipboard-202605291142-ououk.png |
|
Sujata Khatri, 05/29/2026 05:57 AM
|
|
|
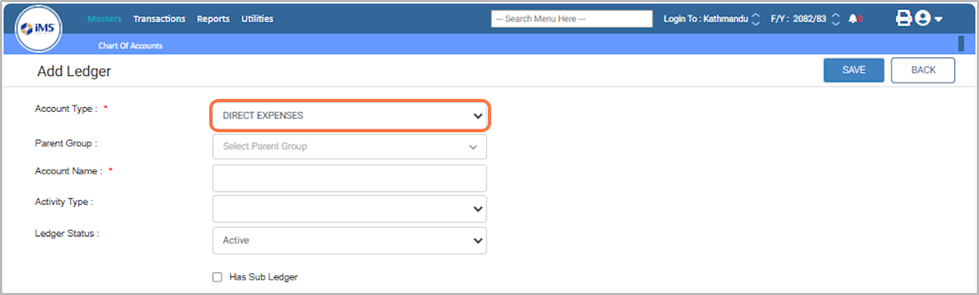
clipboard-202605291143-nv96x.png (84.9 KB)
clipboard-202605291143-nv96x.png |
|
Sujata Khatri, 05/29/2026 05:58 AM
|
|
|
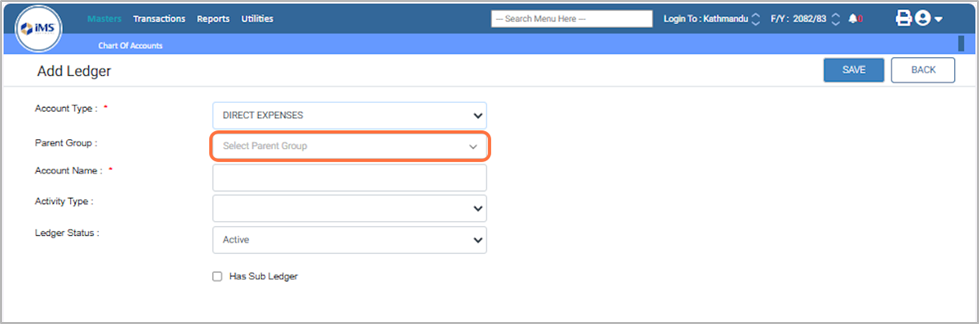
clipboard-202605291143-7jdsk.png (90.1 KB)
clipboard-202605291143-7jdsk.png |
|
Sujata Khatri, 05/29/2026 05:58 AM
|
|
|
clipboard-202605291143-mtfop.png (41.2 KB)
clipboard-202605291143-mtfop.png |
|
Sujata Khatri, 05/29/2026 05:58 AM
|
|
|
clipboard-202605291144-hqz9k.png (90 KB)
clipboard-202605291144-hqz9k.png |
|
Sujata Khatri, 05/29/2026 05:59 AM
|
|
|
clipboard-202605291144-cfiin.png (101 KB)
clipboard-202605291144-cfiin.png |
|
Sujata Khatri, 05/29/2026 05:59 AM
|
|
|
clipboard-202605291144-jtyaa.png (220 KB)
clipboard-202605291144-jtyaa.png |
|
Sujata Khatri, 05/29/2026 05:59 AM
|
|
|
clipboard-202605291144-1ugx9.png (70.7 KB)
clipboard-202605291144-1ugx9.png |
|
Sujata Khatri, 05/29/2026 05:59 AM
|
|
|
clipboard-202605291144-dmtjz.png (52.1 KB)
clipboard-202605291144-dmtjz.png |
|
Sujata Khatri, 05/29/2026 05:59 AM
|
|
|
clipboard-202605291148-xqdrh.png (52.3 KB)
clipboard-202605291148-xqdrh.png |
|
Sujata Khatri, 05/29/2026 06:03 AM
|
|
|
clipboard-202605291149-126j6.png (53.9 KB)
clipboard-202605291149-126j6.png |
|
Sujata Khatri, 05/29/2026 06:04 AM
|
|
|
clipboard-202605291149-hfzfp.png (52.6 KB)
clipboard-202605291149-hfzfp.png |
|
Sujata Khatri, 05/29/2026 06:04 AM
|
|
|
clipboard-202605291149-mbwn0.png (88.5 KB)
clipboard-202605291149-mbwn0.png |
|
Sujata Khatri, 05/29/2026 06:04 AM
|
|
|
clipboard-202605291149-ewbsm.png (88.4 KB)
clipboard-202605291149-ewbsm.png |
|
Sujata Khatri, 05/29/2026 06:04 AM
|
|
|
clipboard-202605291150-ku2io.png (90.6 KB)
clipboard-202605291150-ku2io.png |
|
Sujata Khatri, 05/29/2026 06:05 AM
|
|
|
clipboard-202605291150-scwog.png (91.7 KB)
clipboard-202605291150-scwog.png |
|
Sujata Khatri, 05/29/2026 06:05 AM
|
|
|
clipboard-202605291150-ympzb.png (91.1 KB)
clipboard-202605291150-ympzb.png |
|
Sujata Khatri, 05/29/2026 06:05 AM
|
|
|
clipboard-202605291150-mwugl.png (110 KB)
clipboard-202605291150-mwugl.png |
|
Sujata Khatri, 05/29/2026 06:05 AM
|
|
|
clipboard-202605291150-rh04y.png (89.5 KB)
clipboard-202605291150-rh04y.png |
|
Sujata Khatri, 05/29/2026 06:05 AM
|
|
|
clipboard-202605291151-hrqj8.png (111 KB)
clipboard-202605291151-hrqj8.png |
|
Sujata Khatri, 05/29/2026 06:06 AM
|
|
|
clipboard-202605291151-66tq0.png (87.1 KB)
clipboard-202605291151-66tq0.png |
|
Sujata Khatri, 05/29/2026 06:06 AM
|
|