Membership Scheme Master (Upload)
Technical documentation
08/08/2024
Requirement Overview
This feature helps to create individual membership schemes, allowing the linking of specific products to each plan with detailed discounts, and easy updates to discount rate for those products .
Database Setting
- Introduce the table membershipScheme which include the following table
memSchemeID
SchemeCode
SchemeName
Division
memTypeId
hasThreshold
ThresholdAmt
isActive
memSchemeUID
EntryUser
EntryTimeStamp
EntryDivision (if required)
PhiscalID (if required)
- Introduce the table membershipSchemeDetail which includes the following table.
memSchemeID
MCODE
dis_BeforeThreshold
dis_AfterThreshold
memSchemeDetailUID
memSchemeUID
UI Design
Functional Requirement
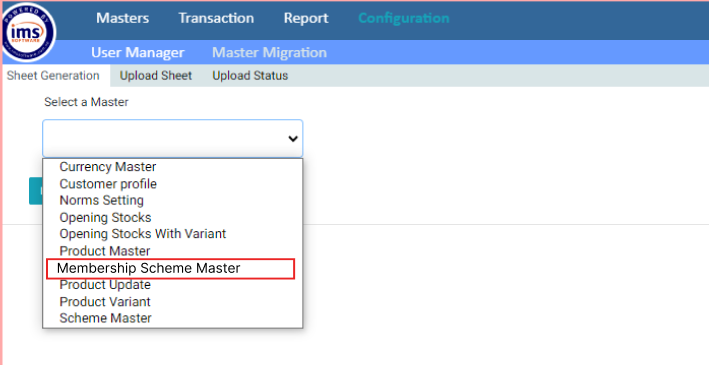
*Requirement 1 : * Create Membership Scheme Master under the Master Migration. The system will allow users to upload Membership Scheme from the Master Migration.
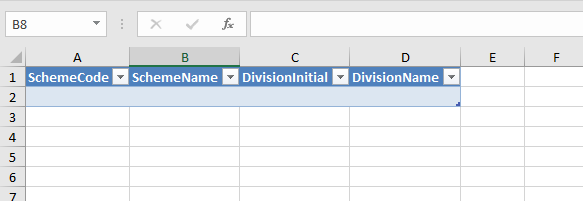
- The sample of excel file are attached below :
https://docs.google.com/spreadsheets/d/1M7wfddNwUtXf9Pqepun5evSTT8RkoRuzB4FvcE9XL5A/edit?usp=sharing


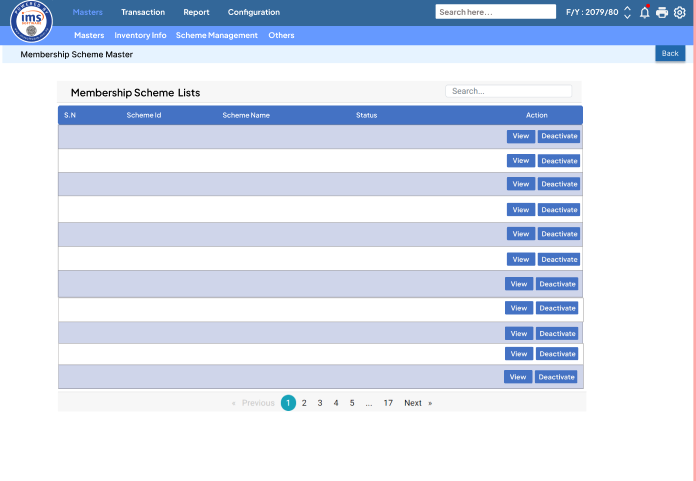
- All the created Membership Scheme will be shown in the Membership Scheme Lists.
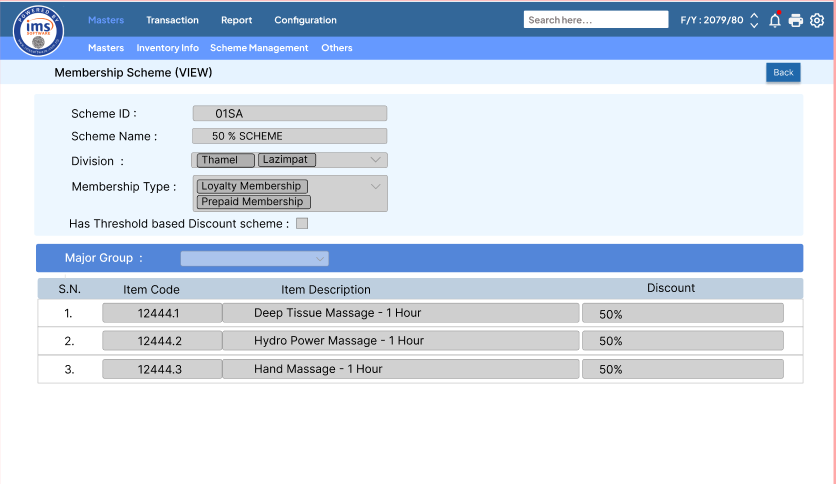
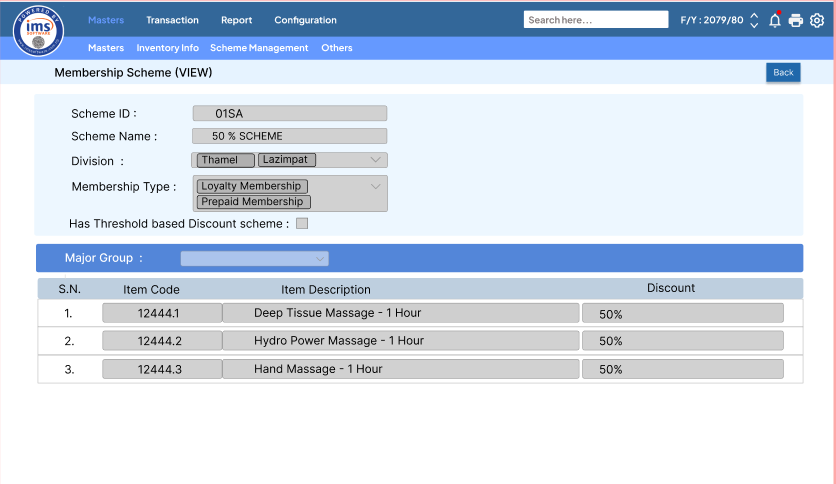
- If the Has Threshold Based Discount Scheme is true then the following UI Should be displayed.
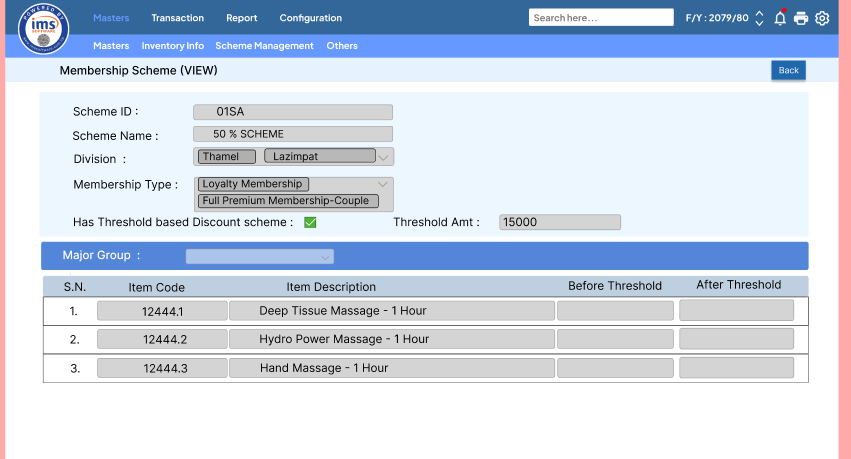
OR , - If the Has Threshold Based Discount Scheme is false, the following UI Should be displayed.
Requirement 4 : When the user clicks the "Deactivate" button, the scheme should be deactivated, and the ISACTIVE column in the paymentmode should be set to 0.
Note:A confirmation message should be displayed during the deactivation process. After deactivation, the status should be updated accordingly.
Application flow
Step 1 : Navigate to Configuration, select Master Migration, and then choose Membership Scheme Master.
Step 2 : Download the sample and enter the data. There are three attached sheets: one for mapping the Membership Scheme to items, one for Membership Type mapping, and one for Division mapping.
Step 3 : After entering and saving the data, go to Master Migration, select "Upload Sheet," then choose "Membership Scheme Master" from the dropdown menu, and select the file from your device. There will pop up a successful message.
Step 4 : Go to the Masters and Select the Membership Scheme Master.When user clicks on Membership Master ,all the Membership Scheme Lists should be shown’
Step 5 : When a user clicks on View then all the uploaded data should be shown in Membership Master (View) UI.
Step 6 : When the user clicks "Deactivate," an alert message should pop up. After selecting "Yes," the status should be updated accordingly.